How to create a quality website on your own. Step-by-step walkthrough

A website is an integral part of any modern business. For some, it is an online business card, for others, it is the foundation of their marketing activities, or even the entirety of their sales cycle. In any case, a website puts your business on the map (if you’re not online, you don’t exist) and helps you work better and more efficiently.
No other channel—neither social media, nor Facebook groups, nor ad servers—can replace a website as your business card, as a sales platform, and as a unique environment for providing information.
A company website:
- makes it possible for you to display information about your company in a clear and structured way;
- helps you reach potential clients at any time of day or night;
- helps boost sales;
- enables you to show up in results on Google and other search engines;
- enables a range of digital marketing activities;
- improves the credibility and visibility of your business.
In this tutorial you will learn how to create your own website, using only skills you already have and Mozello.
View step-by-step video tutorial.
Step 1: Register: quick and easy
Registration is free and does not take more than a minute of your time.
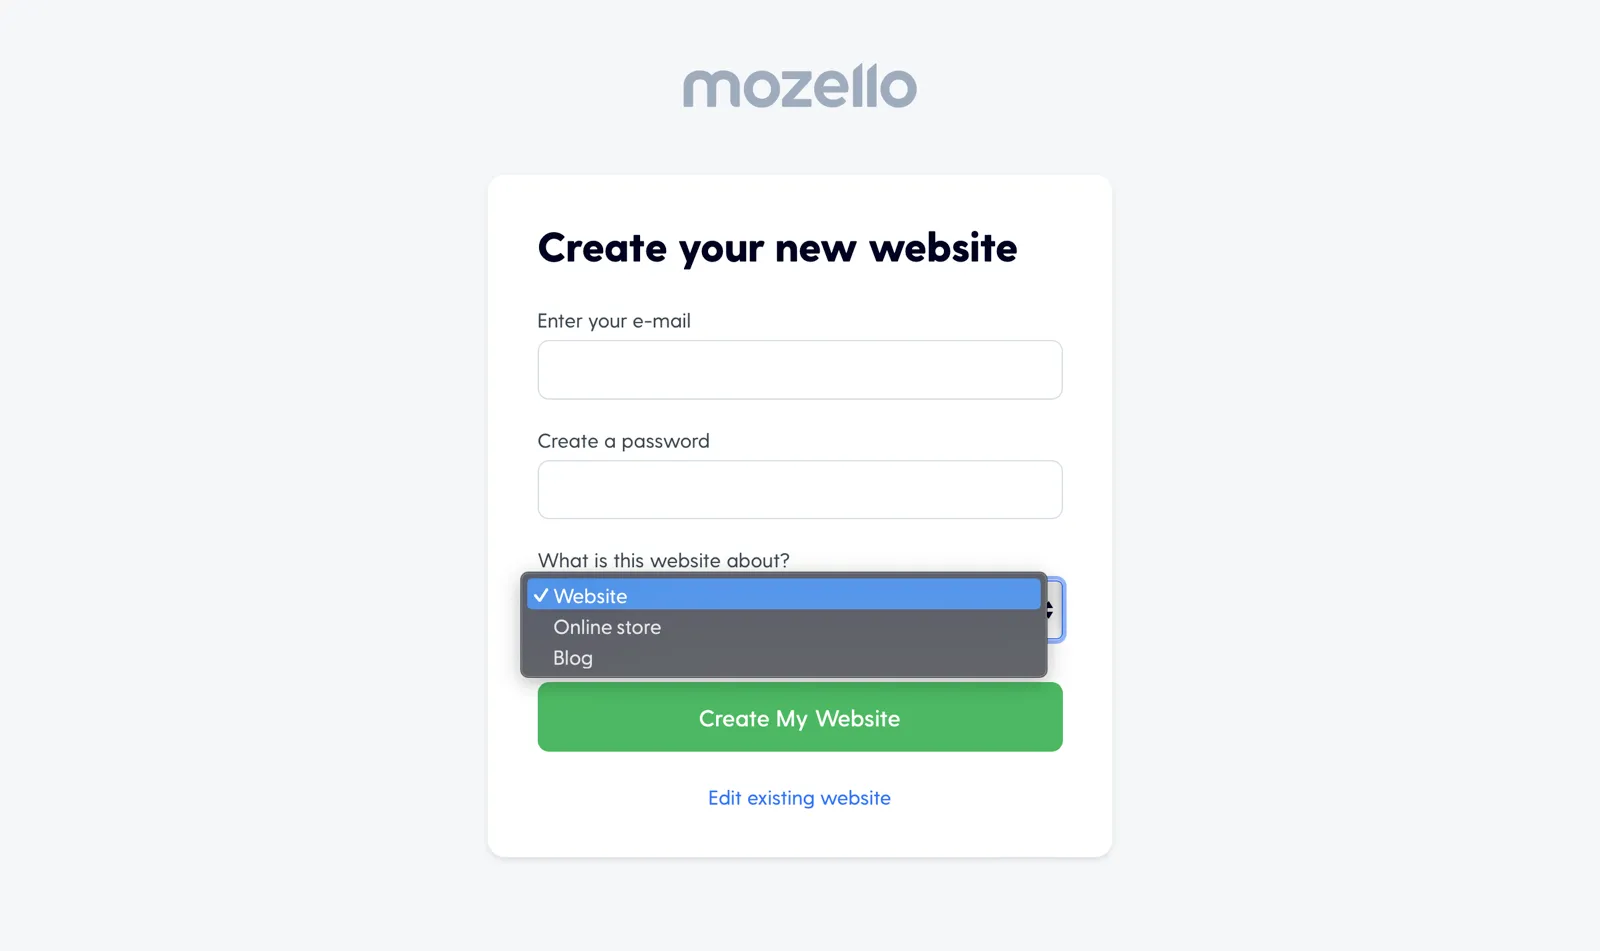
- Open Mozello website and press Create a website.
- Enter your e-mail address and choose a password.
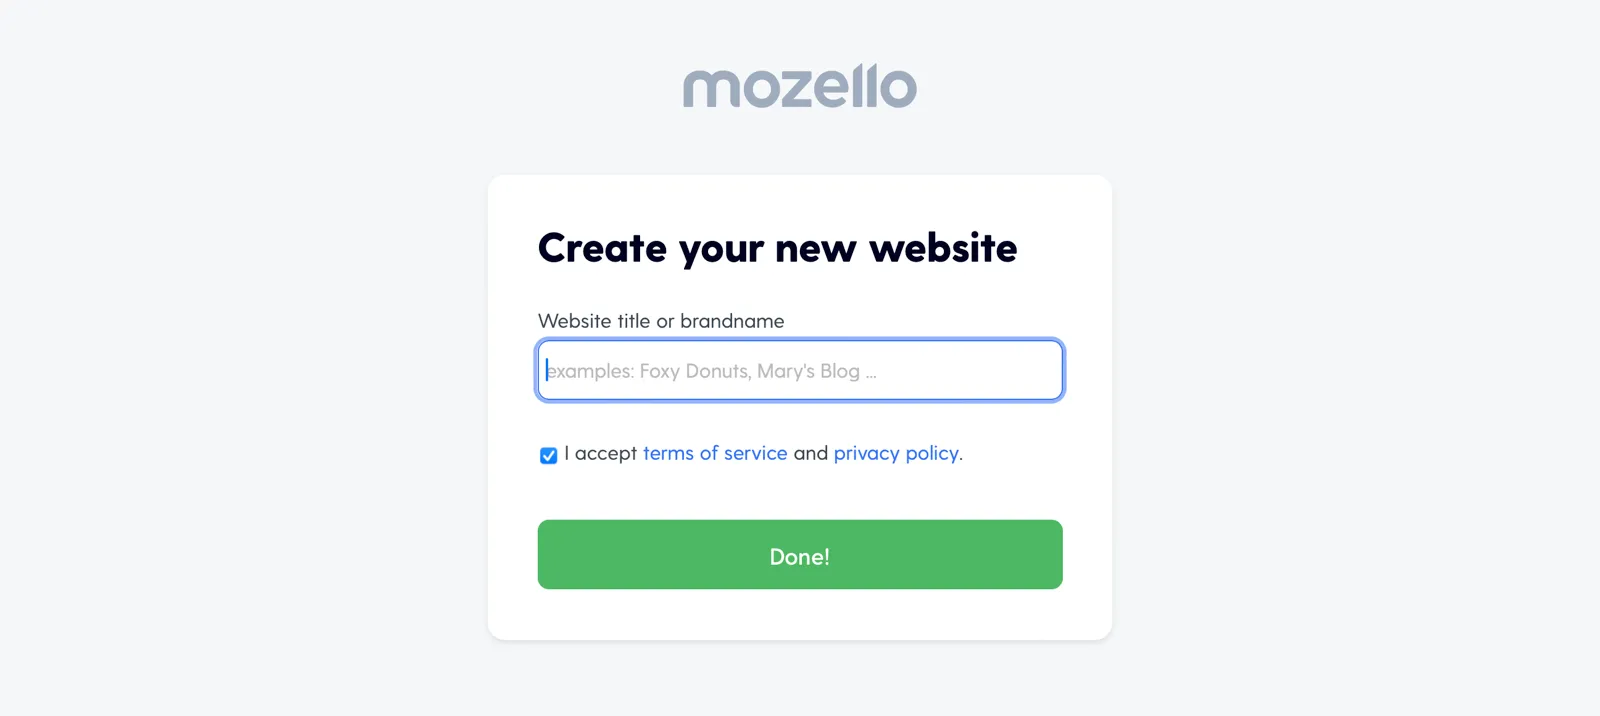
- Next, enter your website name or brand (you can change it later) and click Done!
Step 2: Choose and customise the design of your website
First, choose one of the design templates. All the templates are adaptable and will look great on computers and mobile devices, but most importantly, you can customise any design to suit your preferences and your brand.
You can change the design template at any time without losing the information you have entered on the website.
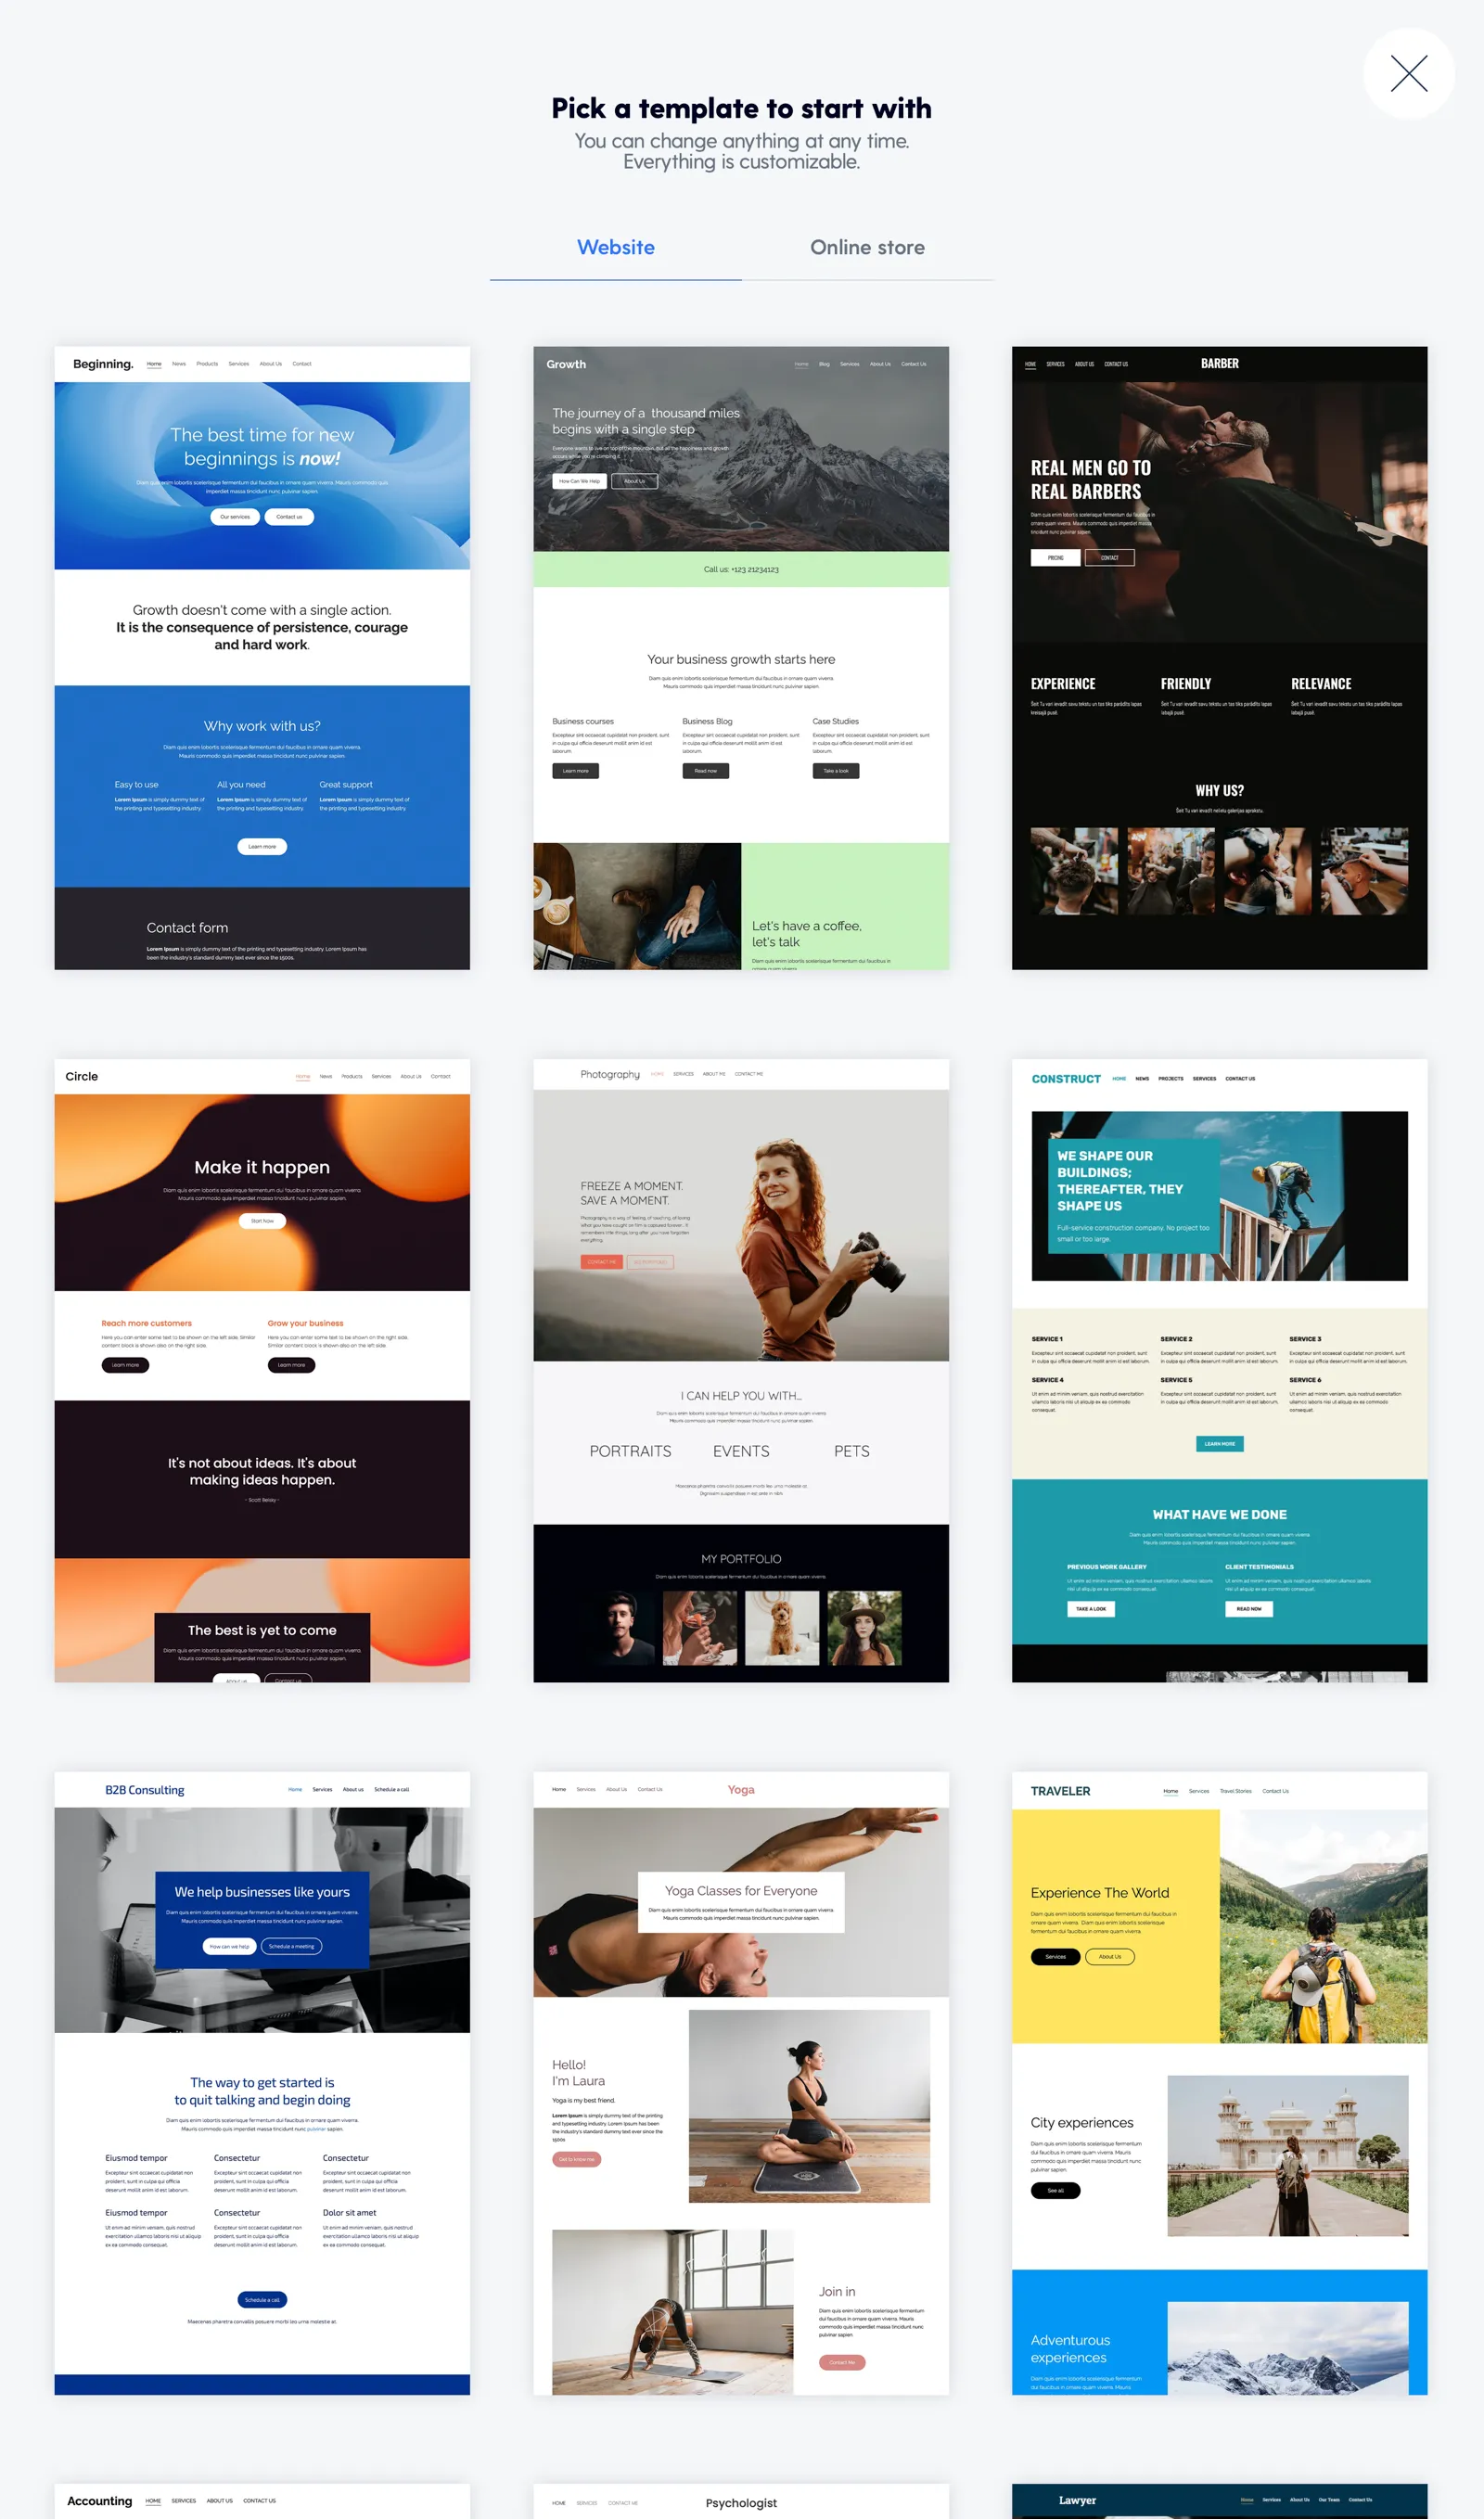
Once you have chosen the design, you can customise it in detail.
2.1. Add your logo
Adding your logo improves visibility, strengthens the brand, and builds trust.
If you don’t have your own logo yet, don’t worry! There are a few ways to create it:
- Make your own logo using one of the logo creation platforms.
- Find a professional freelance designer.
- Look them up on Fiverr or 99designs, and find someone to draw your logo for a relatively low price.
To insert the logo:
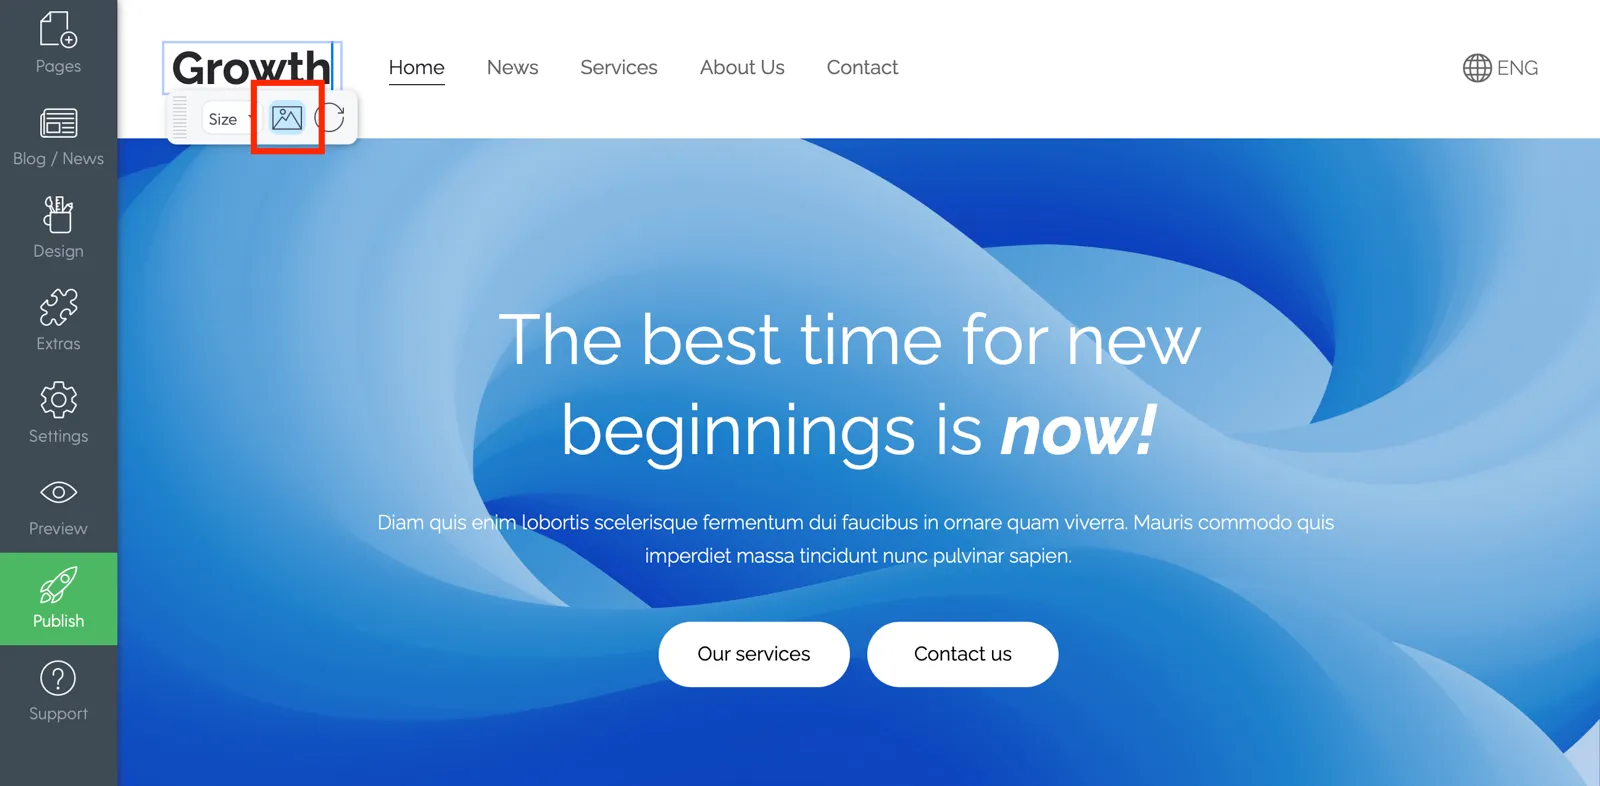
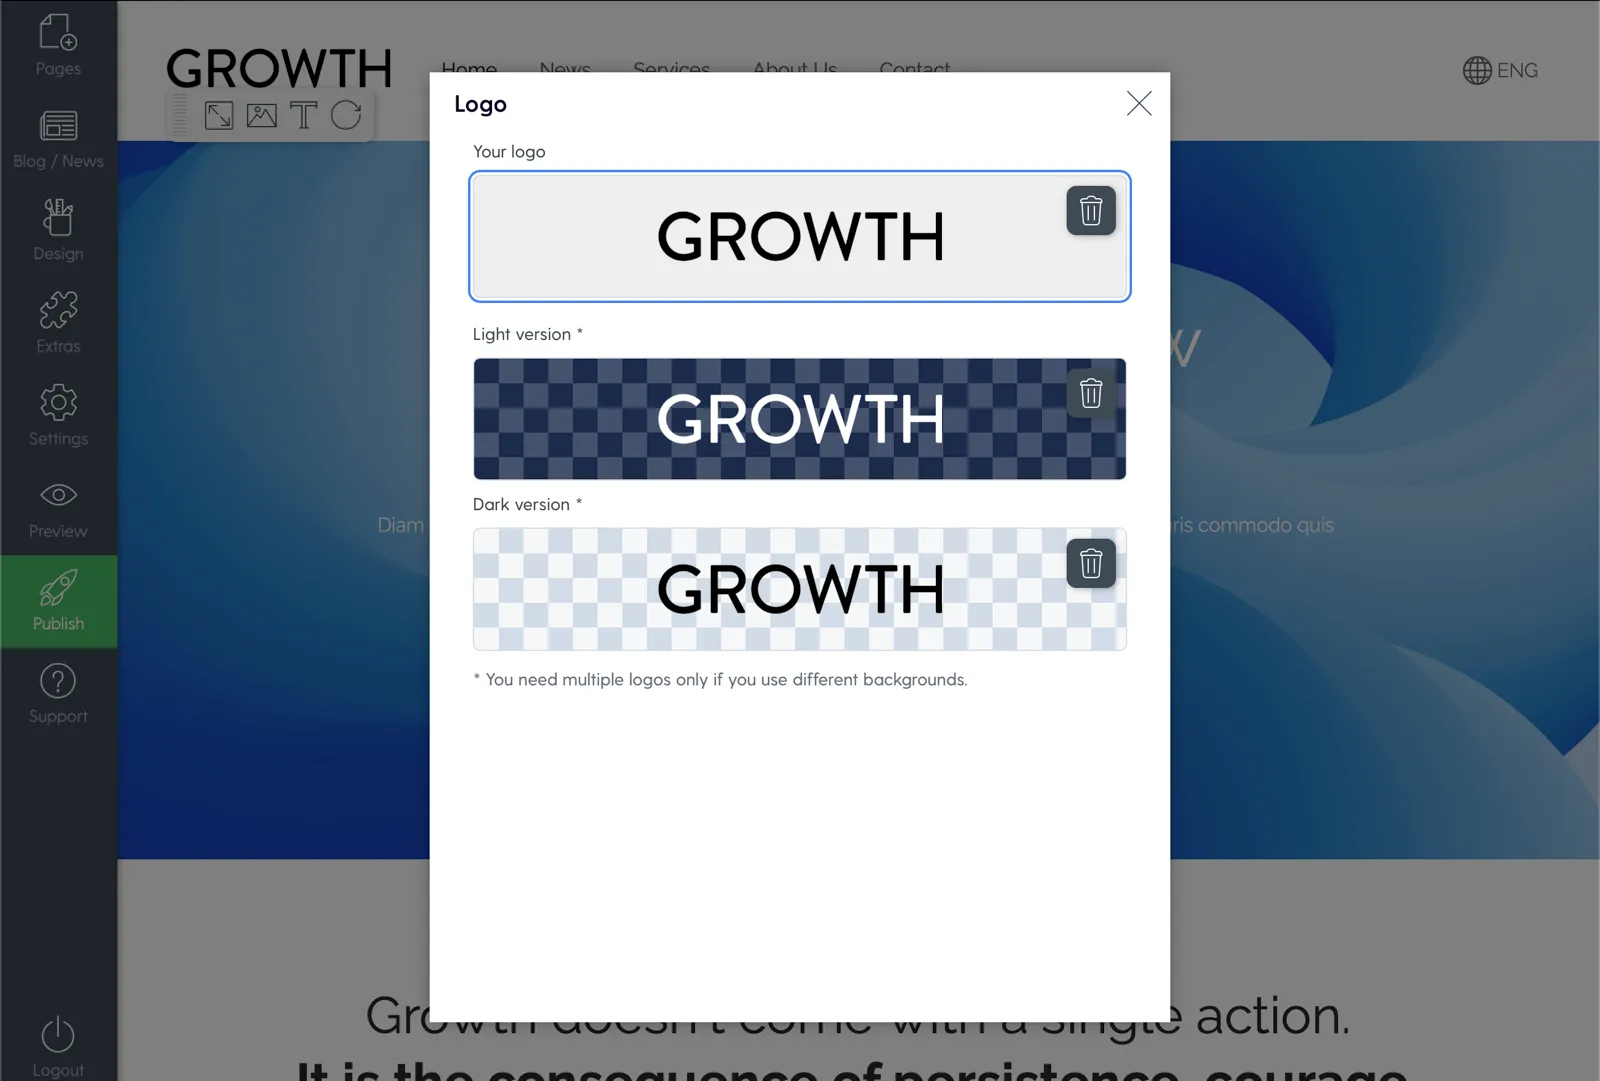
- select the field with the name of your website at the top of the page and click on the image icon.
- A window will then open where you can add all the versions of your logo (main version, light version, dark version). These versions will be only necessary when you'll use different color backgrounds. In the field Your logo place the the version that you want to use as the main one.
- Once you upload the logo, you can adjust its size.
2.2. Create the home page of your website
Mozello automatically creates a page called ‘Home’, which you can immediately change as you see fit.
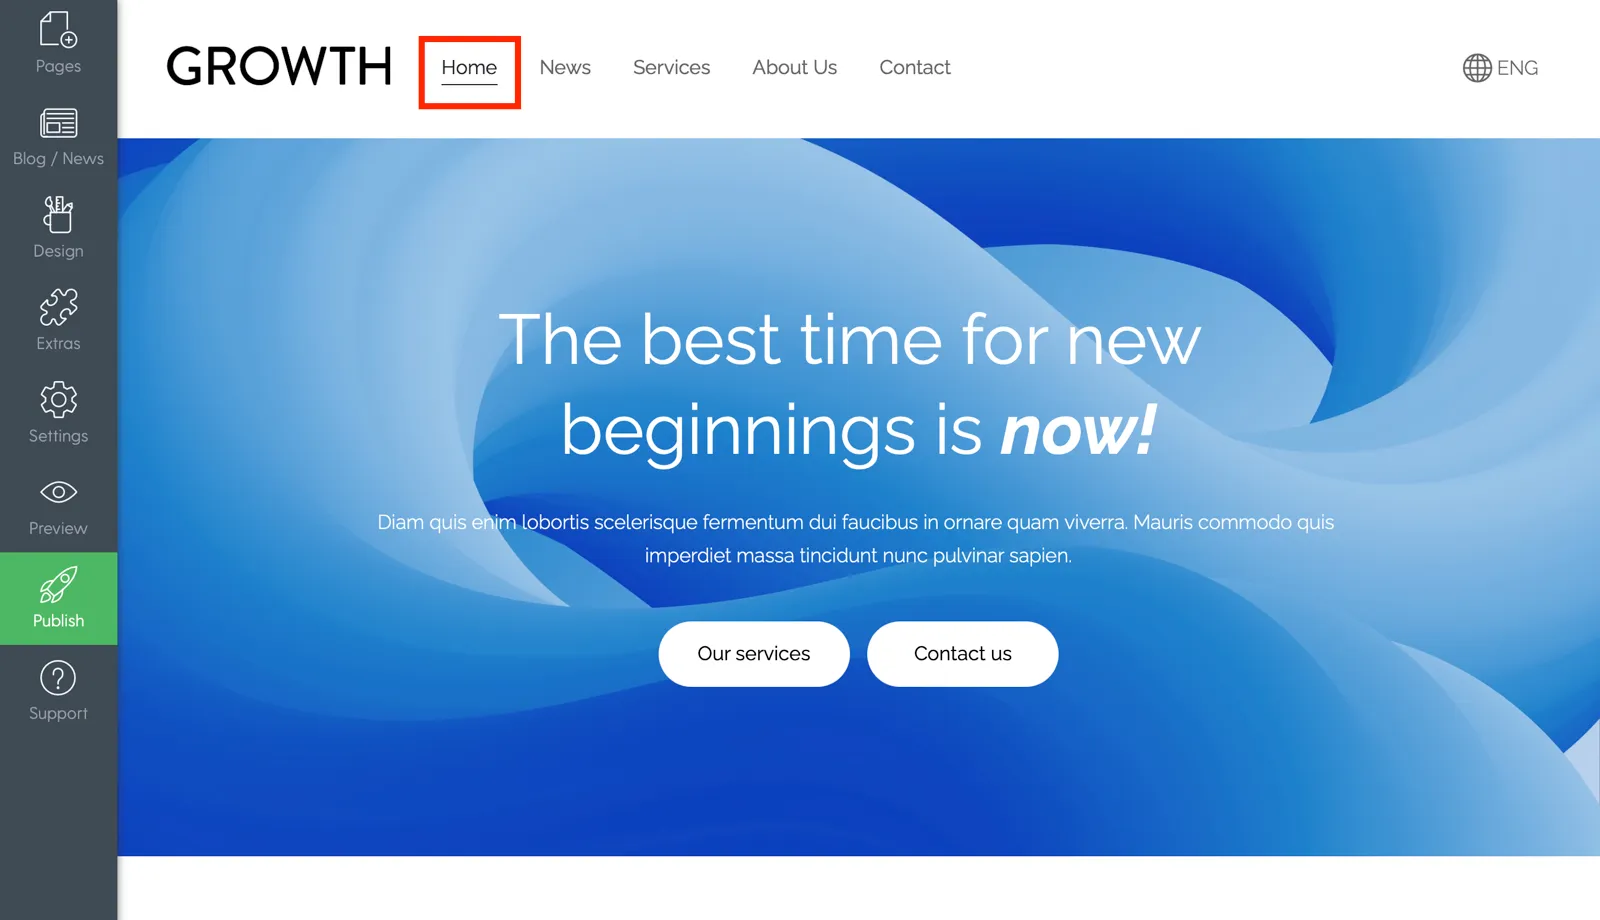
The home page is the place for you make the first impression of your business, presenting visitors with the key information.
The home page should answer questions like:
- WHAT you are (logo/business name)
- WHAT you offer
- HOW your service can help the client
Follow these steps to create a successful home page.
2.2.1. Customize the main menu
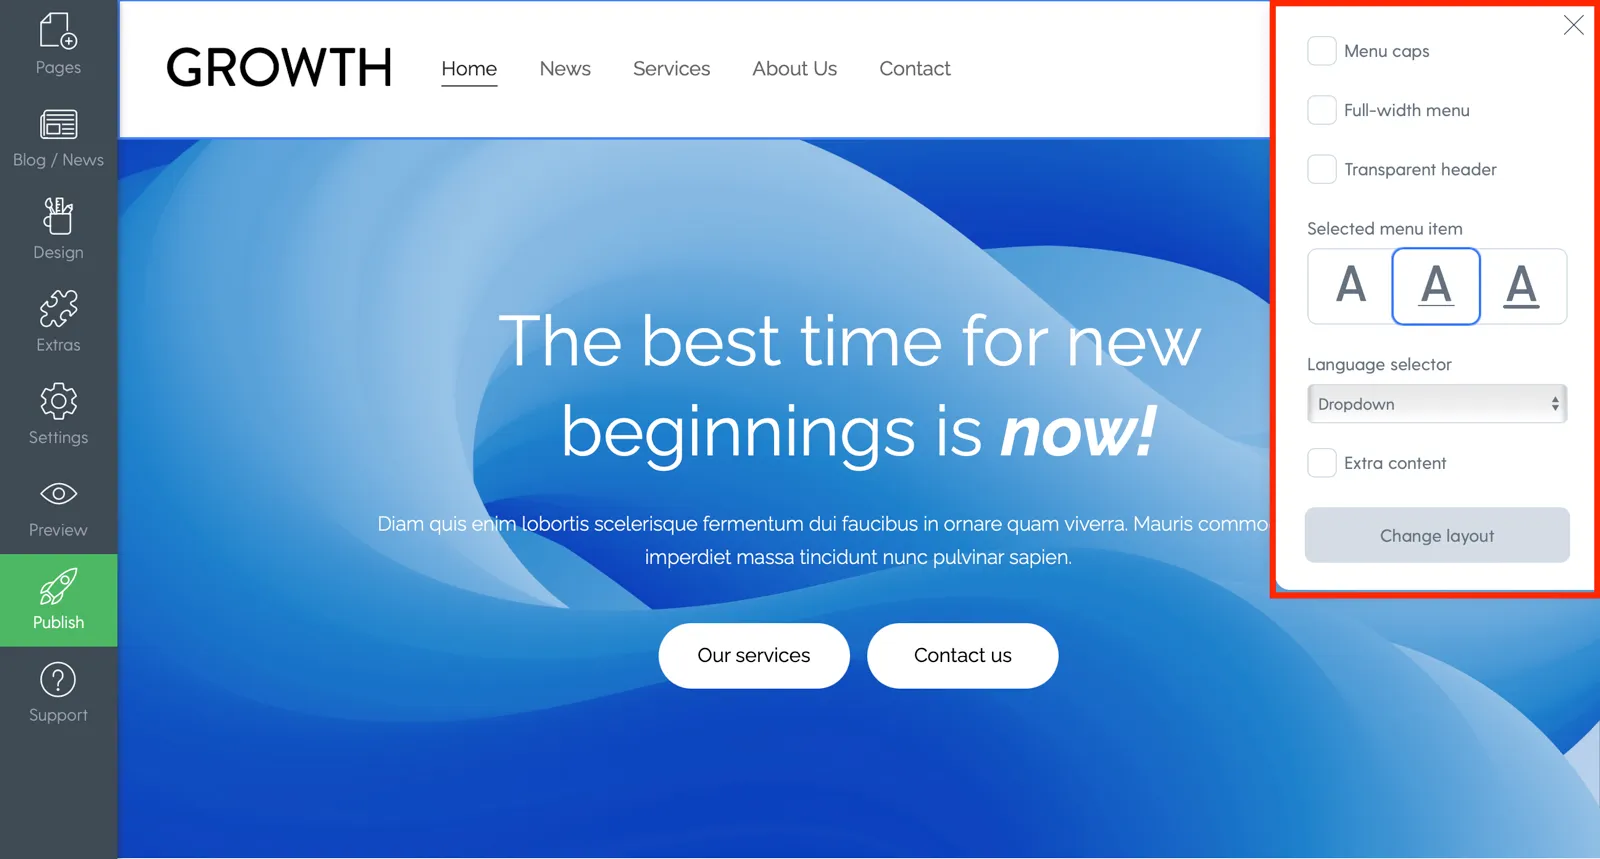
You can customise the layout of the main menu by hovering over the menu and clicking on the settings icon shown in the picture.
There you can choose menu style options. For example, make the menu transparent and merge with the banner or many other options.
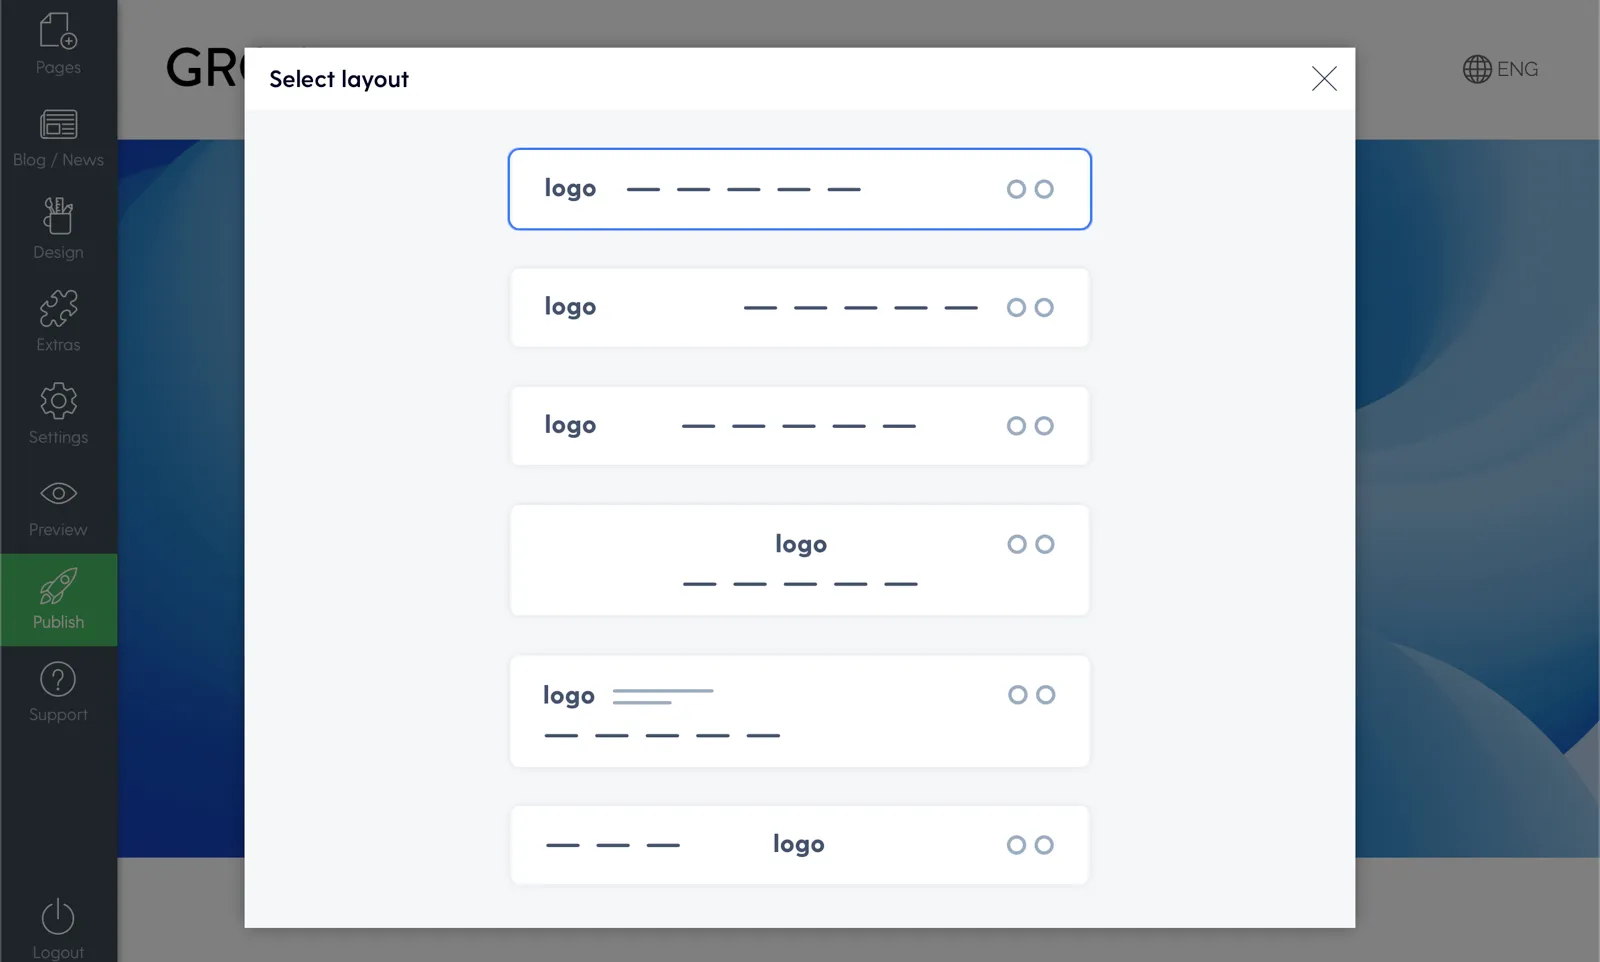
To change the layout of the menu, click on the button Change layout.
We recommend choosing a layout that works well with your logo. If the logo is vertical, it is better to go with a design where the logo is above the menu, but if the logo is horizontal, you can choose the kind you like.

Video: How to edit website header and footer.
2.2.2. Personalise the main banner
You can customise the look of your banner by pressing the settings button.
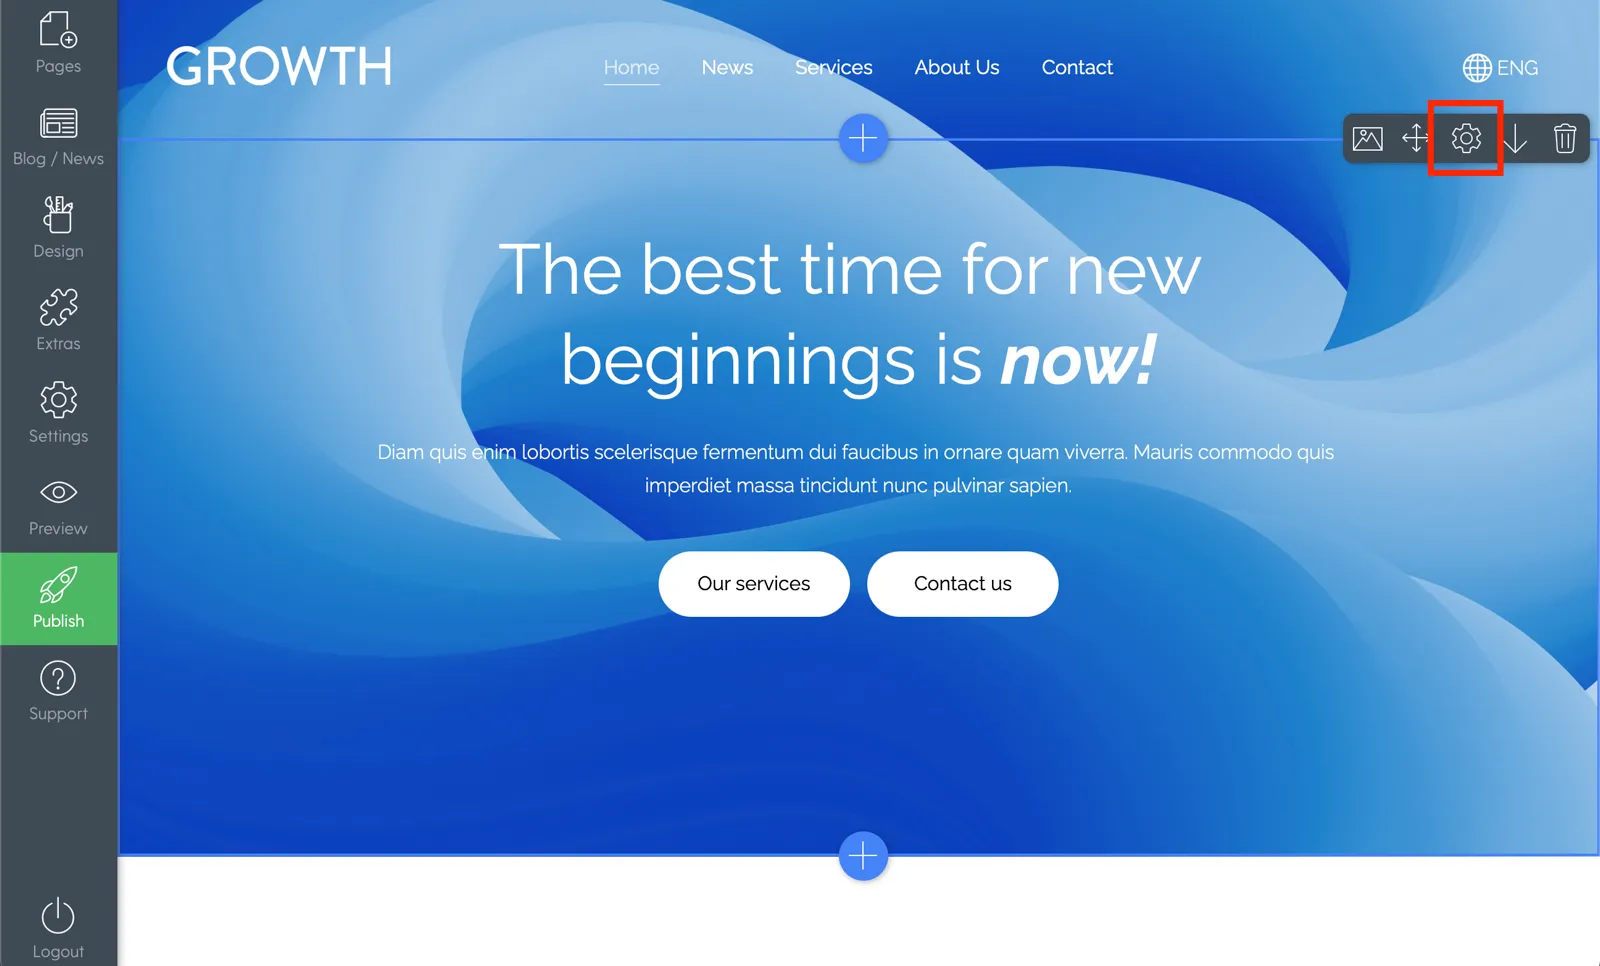
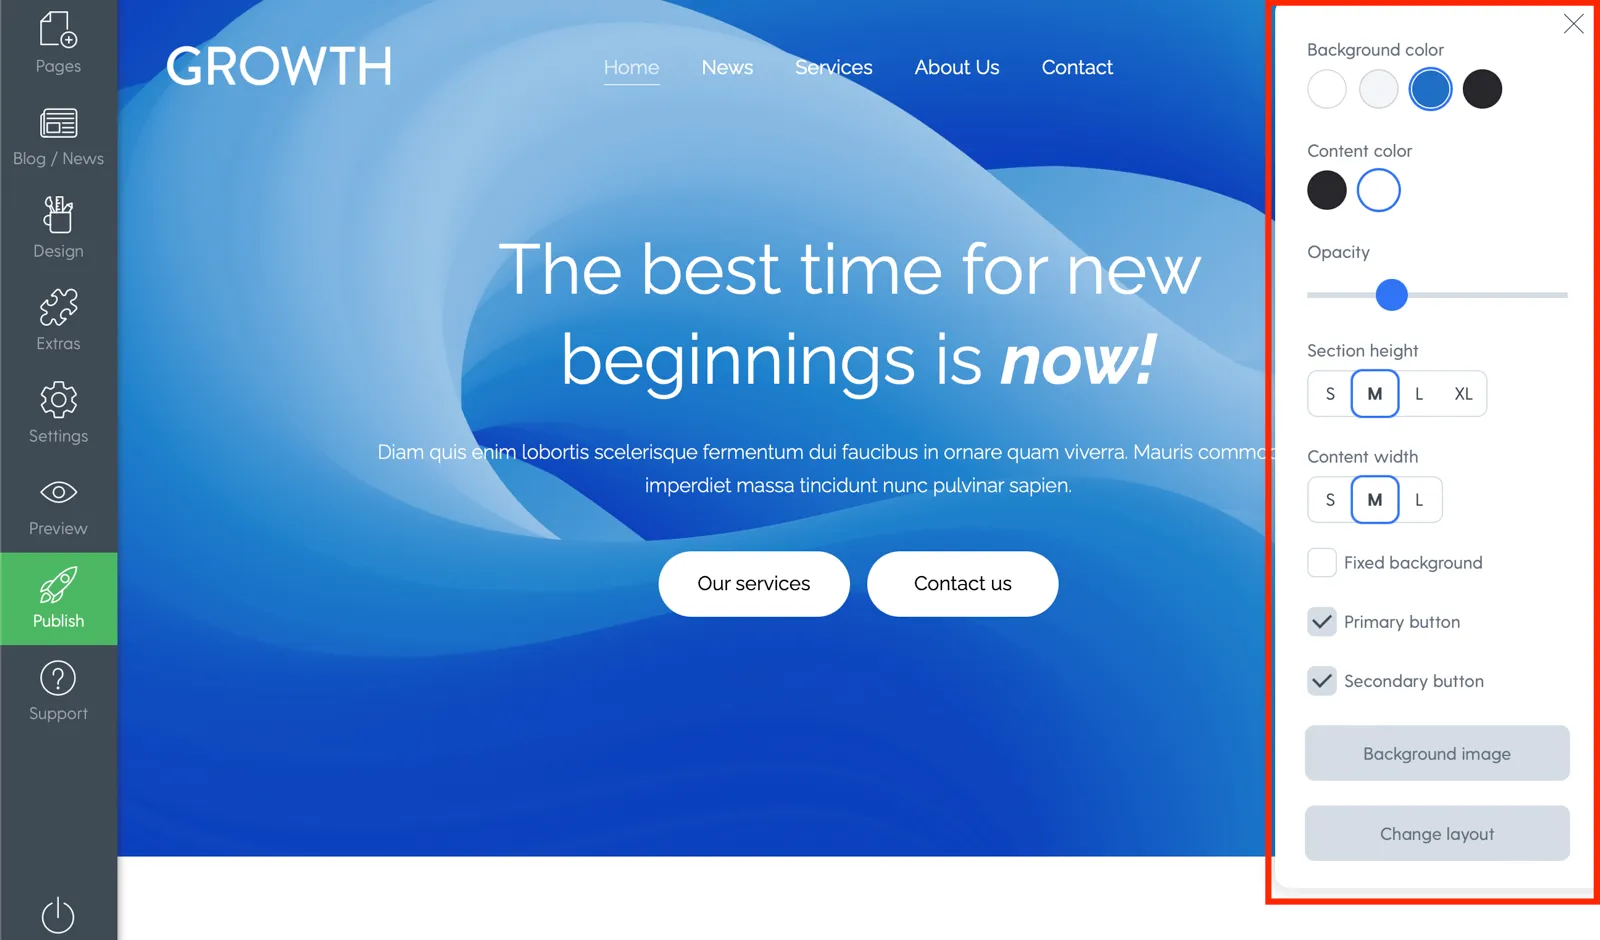
A window will open where you can adjust multiple banner parameters:
- change the background color,
- adjust height,
- adjust width,
- choose the number of buttons,
- change the background image,
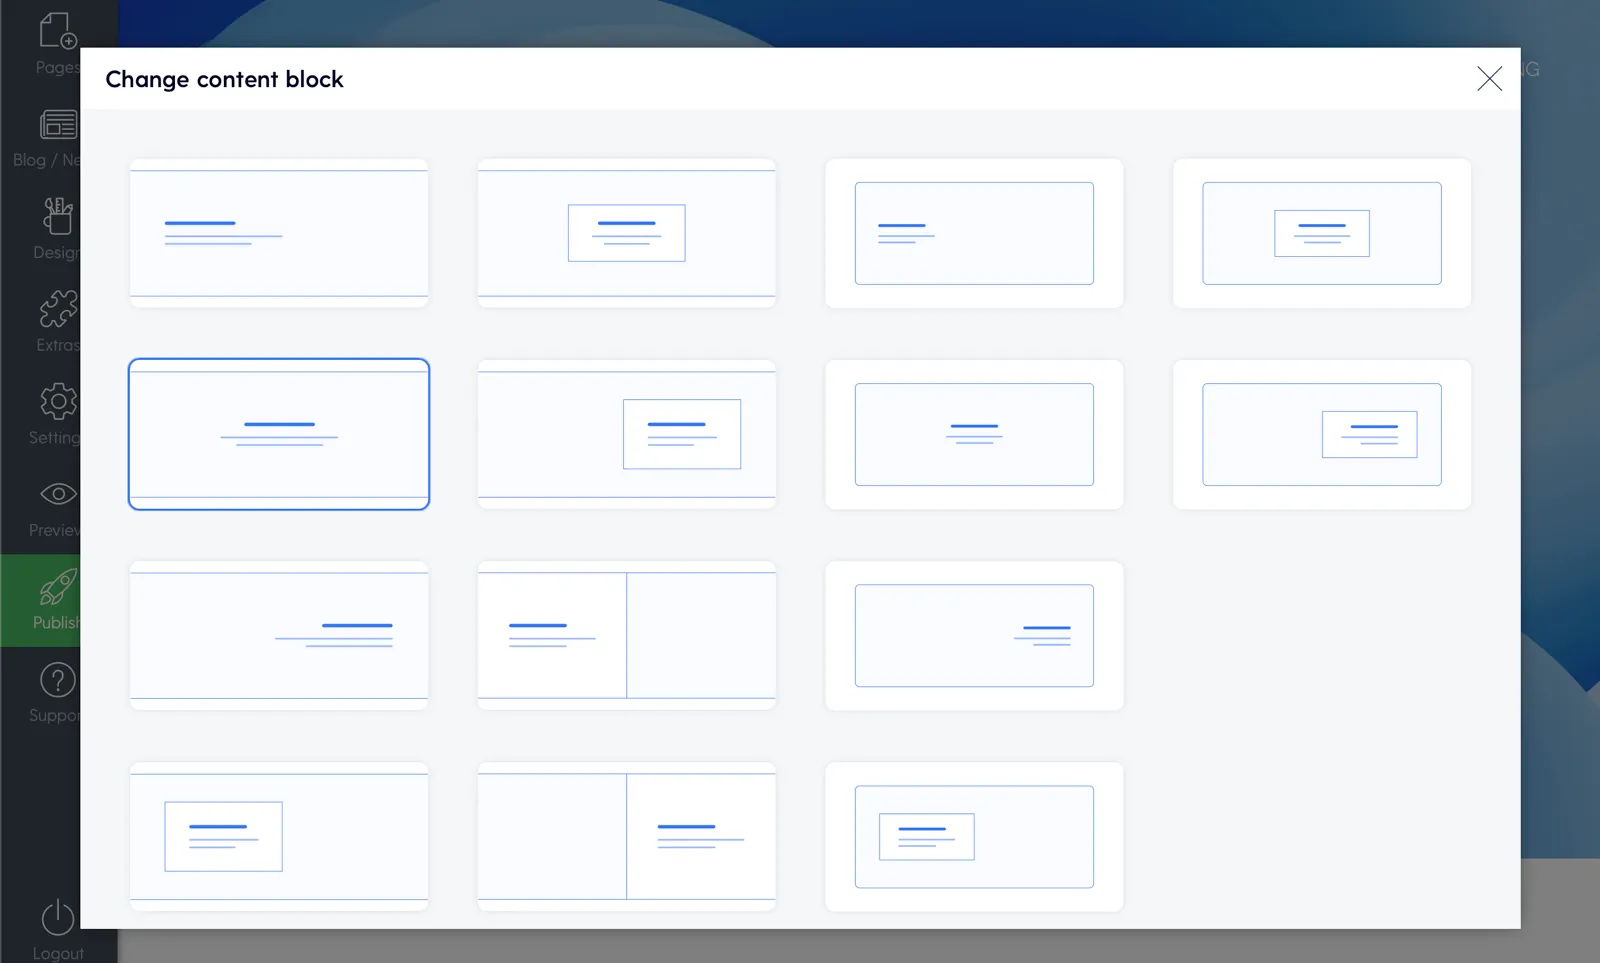
- change the banner layout,
- and other options.
2.2.3 Add new content blocks and customise their design
With Mozello, you can easily add new content blocks to expand your website with structured information.
To add a new content block, click on the + symbol above or below an existing block. A window will then open where you can select the type of your new content block.
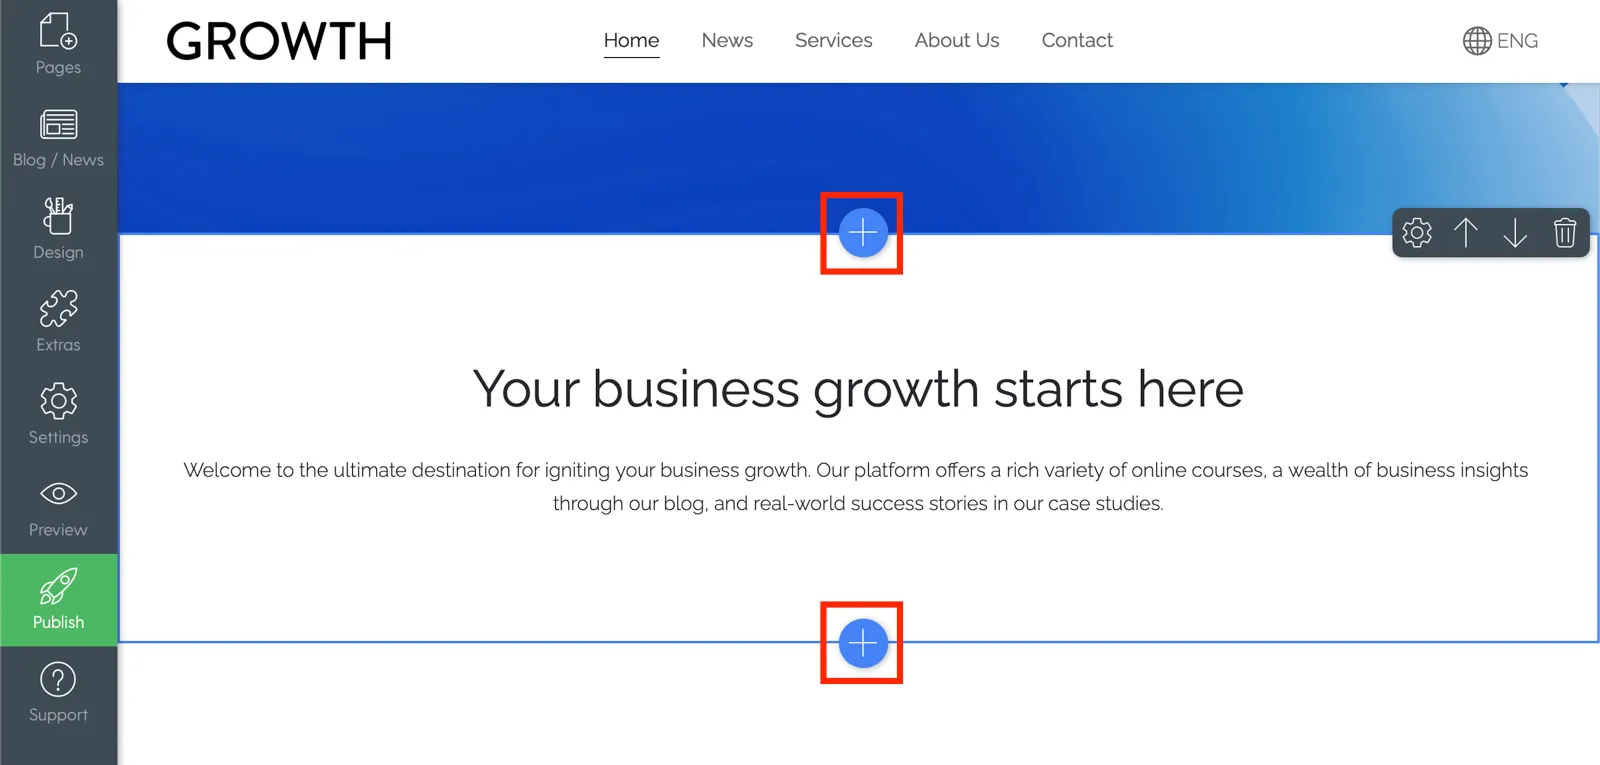
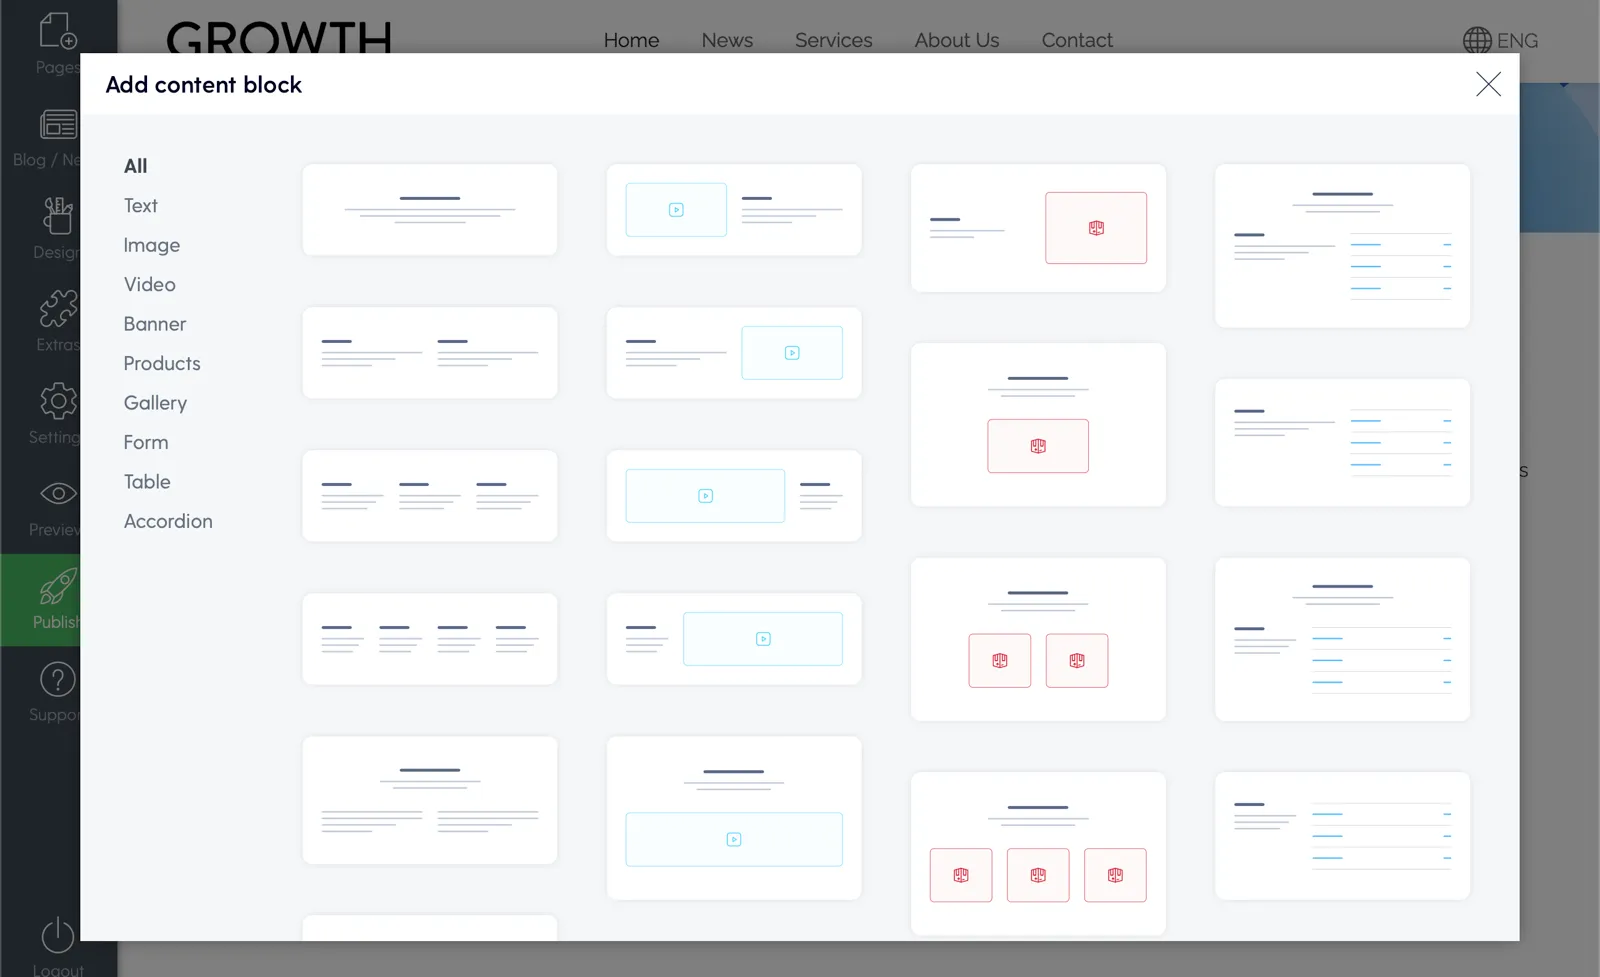
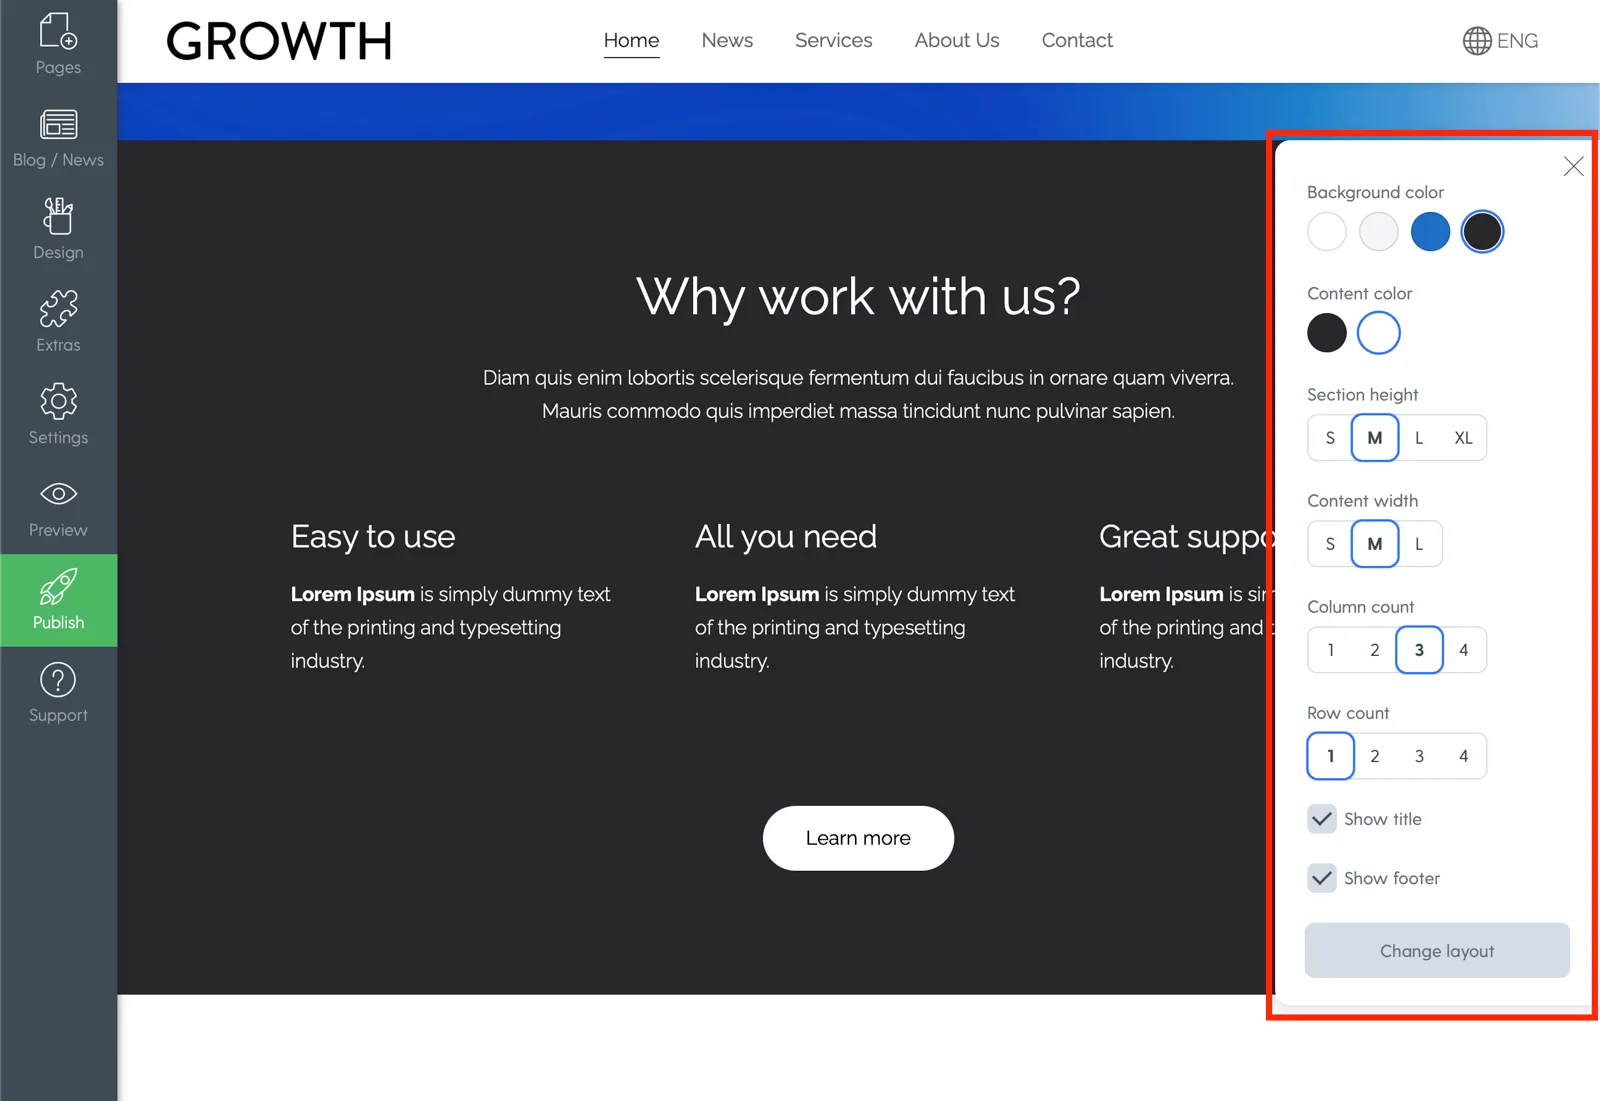
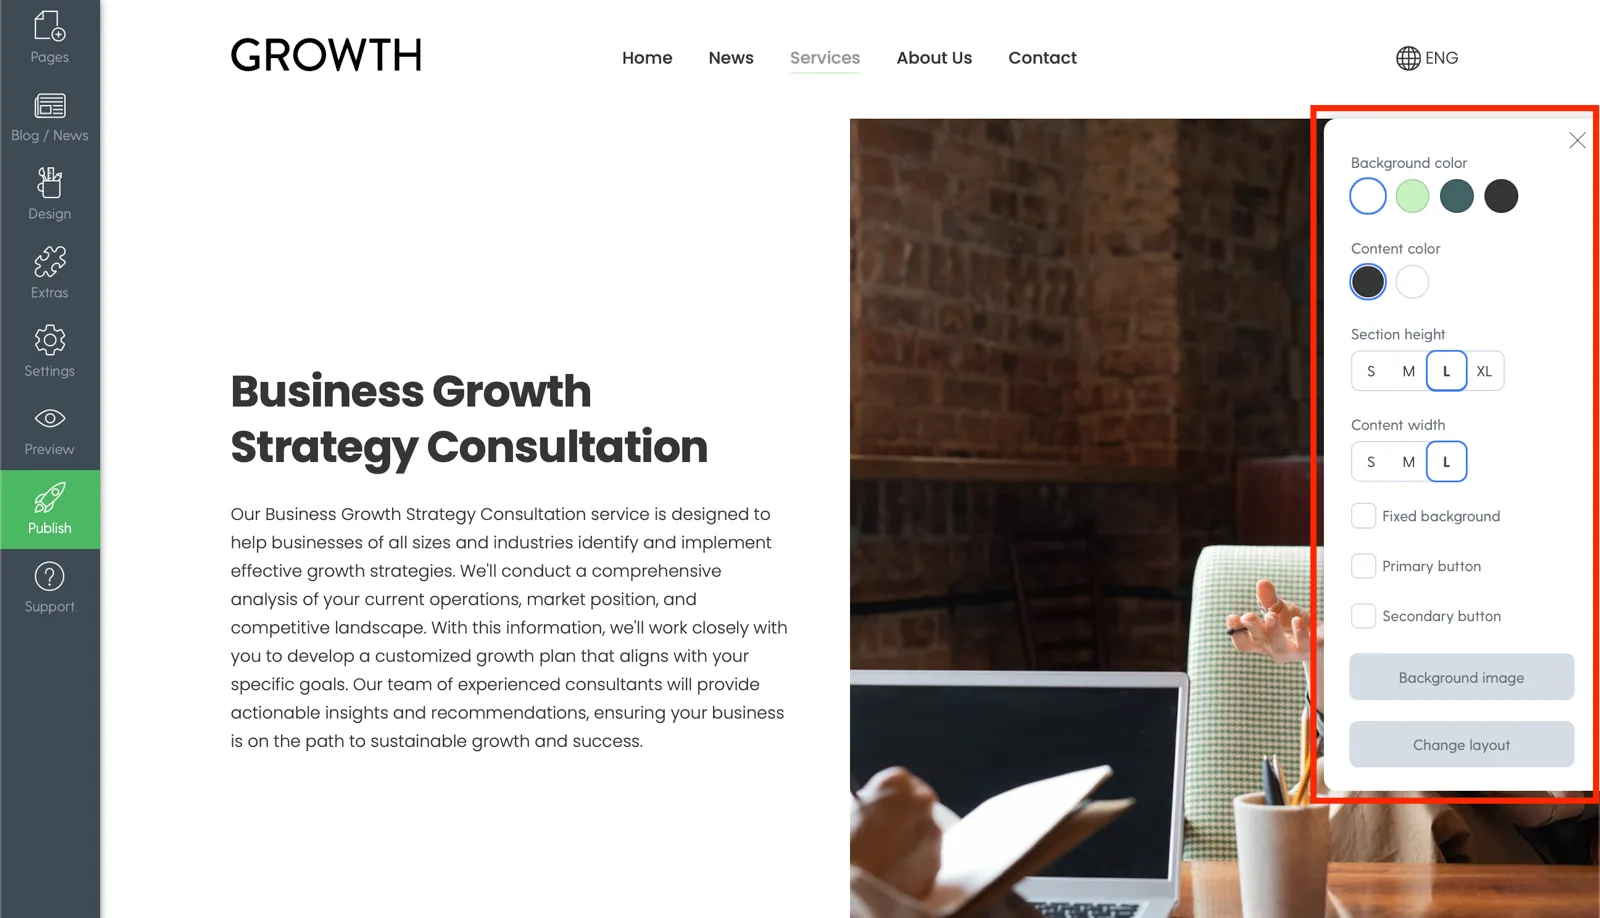
Once you add the content block, you can edit its design by clicking on the settings icon at the top right corner of the content block.

Open the customisation settings for the content block:
- Background and content colour,
- height and width of the block,
- number of columns and rows in the content,
- other options depending on the type of the block you choose.
2.2.4. Enter your information.
Once the banner and layout is set up, all you have to do is replace the texts by entering the information in the content blocks. To start, click on a content block and fill it with your information.
Tips for successful texts:
- Make sure the texts are short, clear, and to the point.
- Focus on the benefit to the customer.
- Button texts must be designed as calls to action. For example, if you create a button for the Contacts page, you can enter ‘Contact us’ as the button text: this will help direct your website’s guests to a specific action.
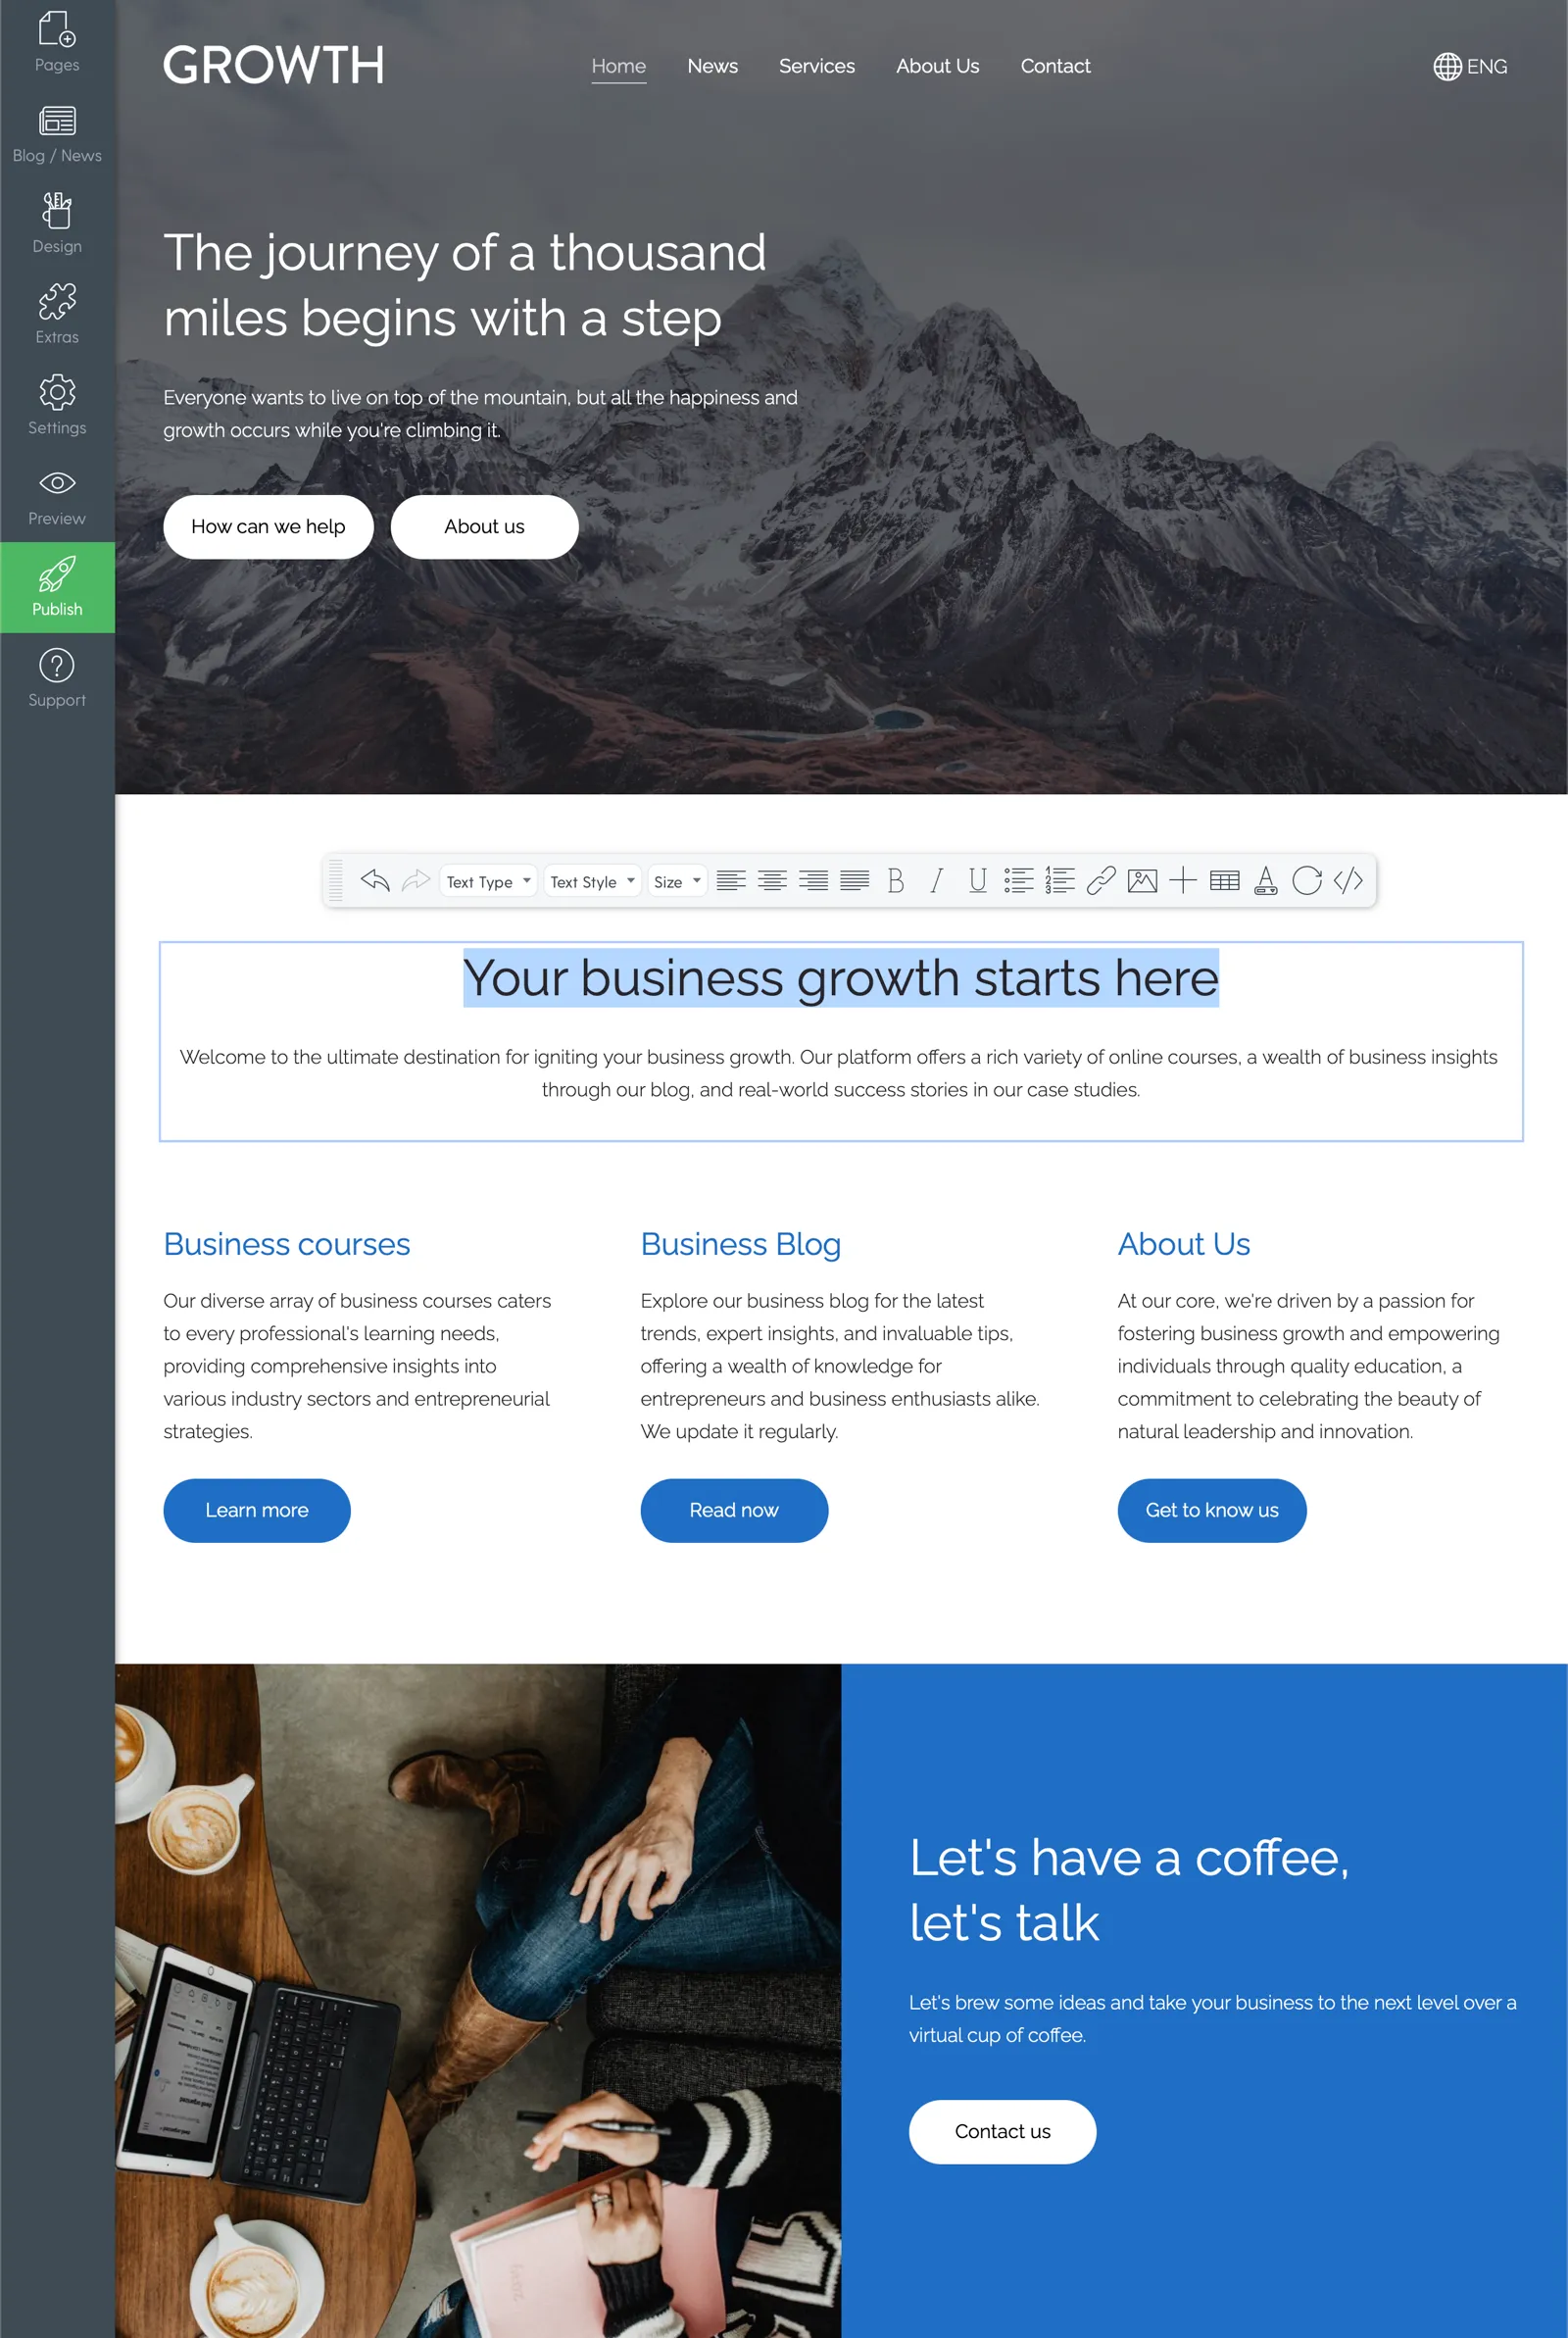
Video: How to format text for a website.
Tips: How to write website texts that work and get results
2.3. Edit the colours and fonts
The next step in the website design process is to customise the colours and fonts, for a unique visual appearance, making it possible for you to tailor the design to your business image.
2.3.1. Edit the colours
- In the main toolbar, select Design and click Change Colours.
- Choose from the colour combinations already offered, or edit the elements individually by clicking on the Advanced button.
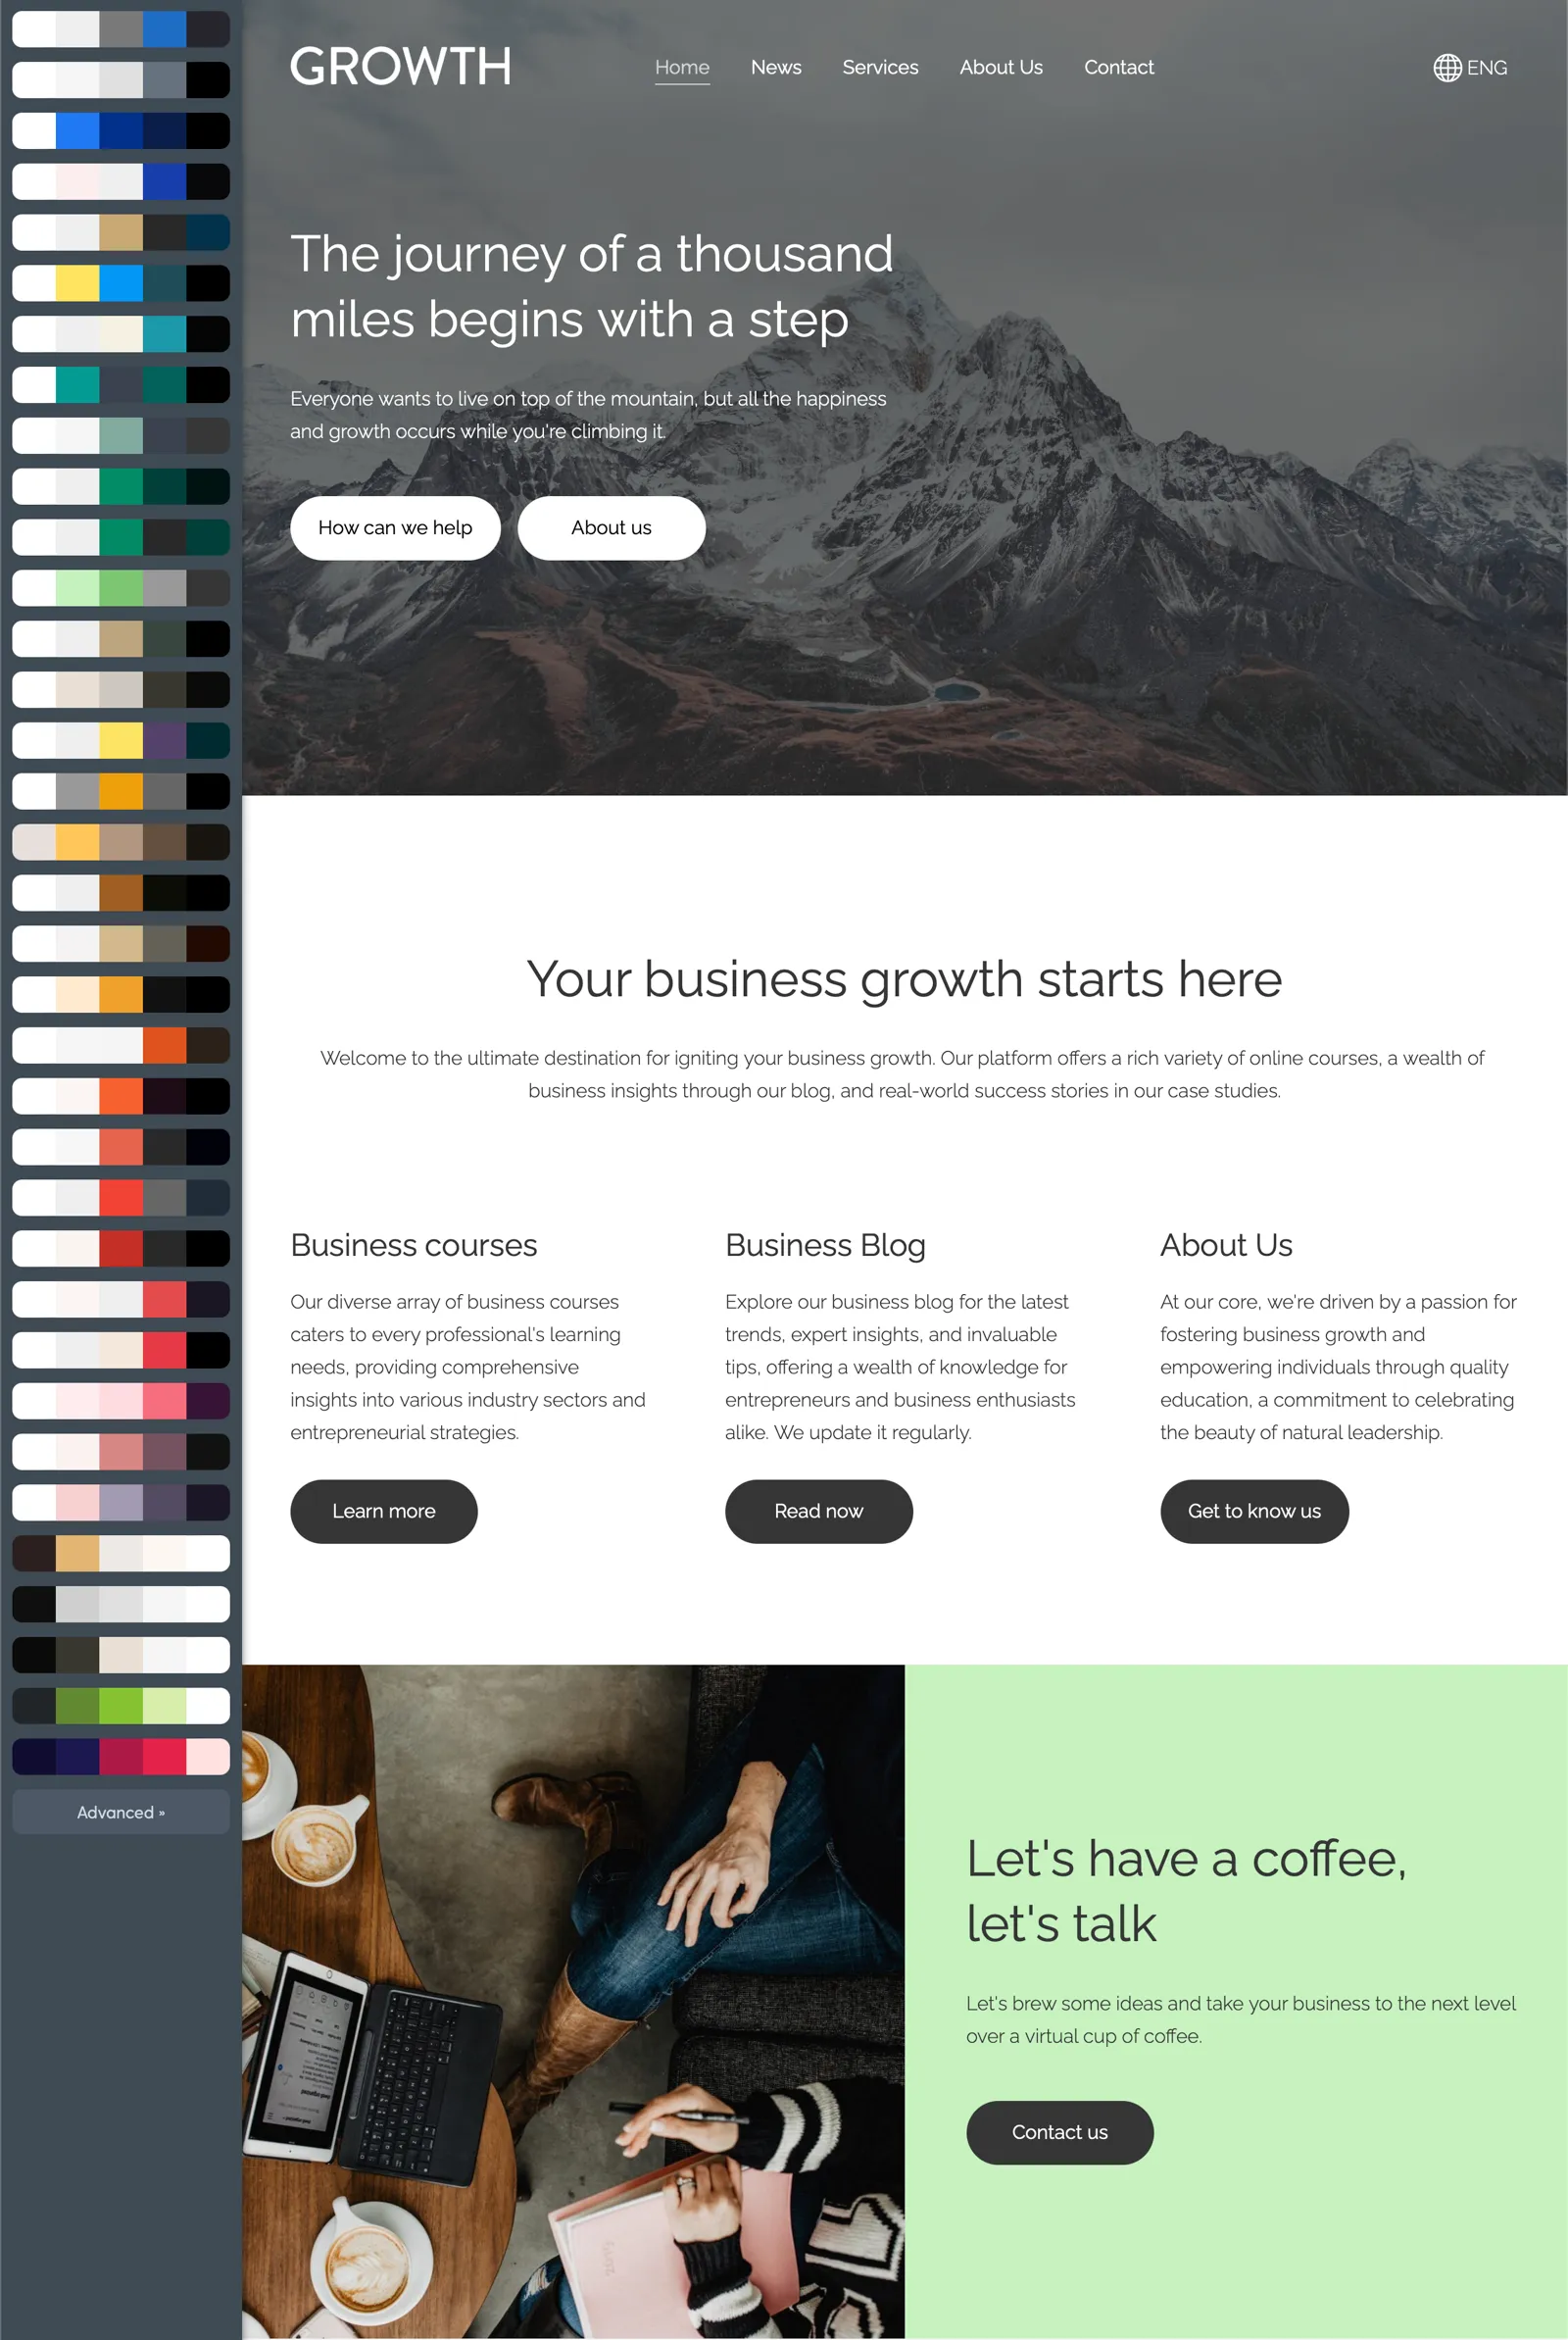
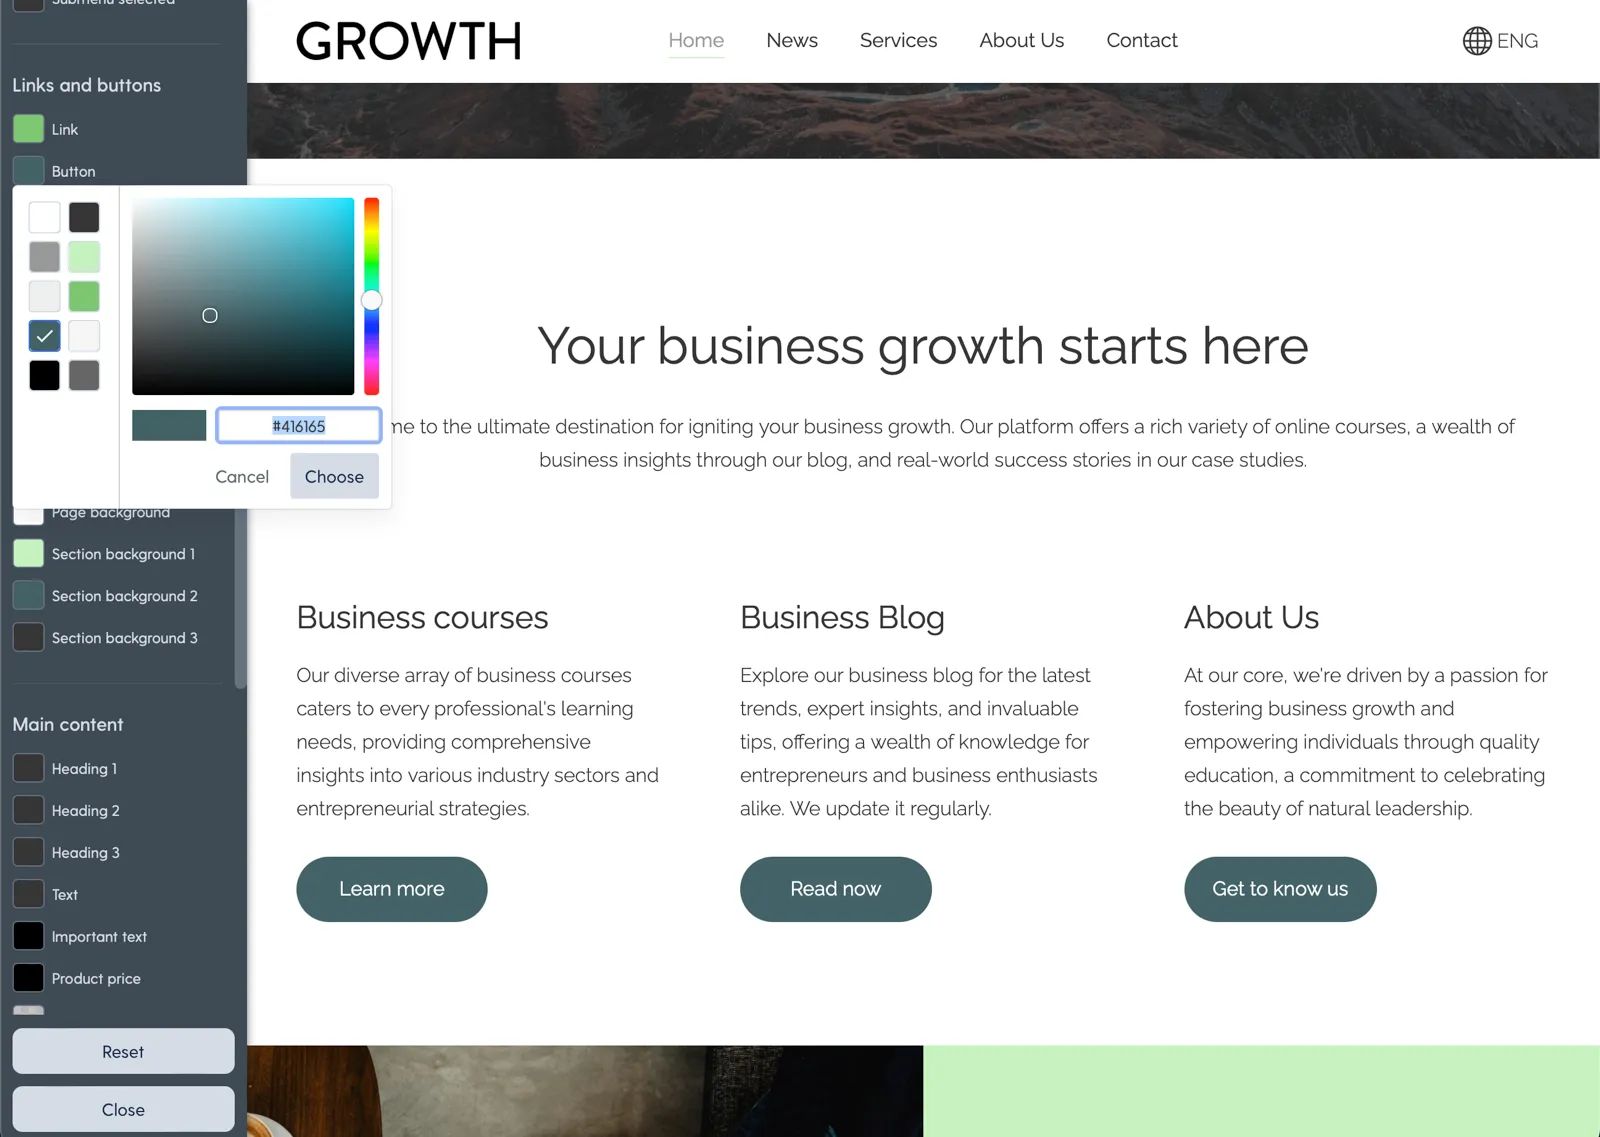
Colour is an integral component of a brand, but when designing your website, we recommend not getting to carried away with it: choose no more than 2–4 main colours.
The coolors.co tool is of great help for choosing colors and creating balanced color combinations.
Video: How to customize your website colors.
2.3.2. Choose a font combination
- In the main toolbar, select Design and click Change Font Scheme
- Choose one of the font combinations offered.
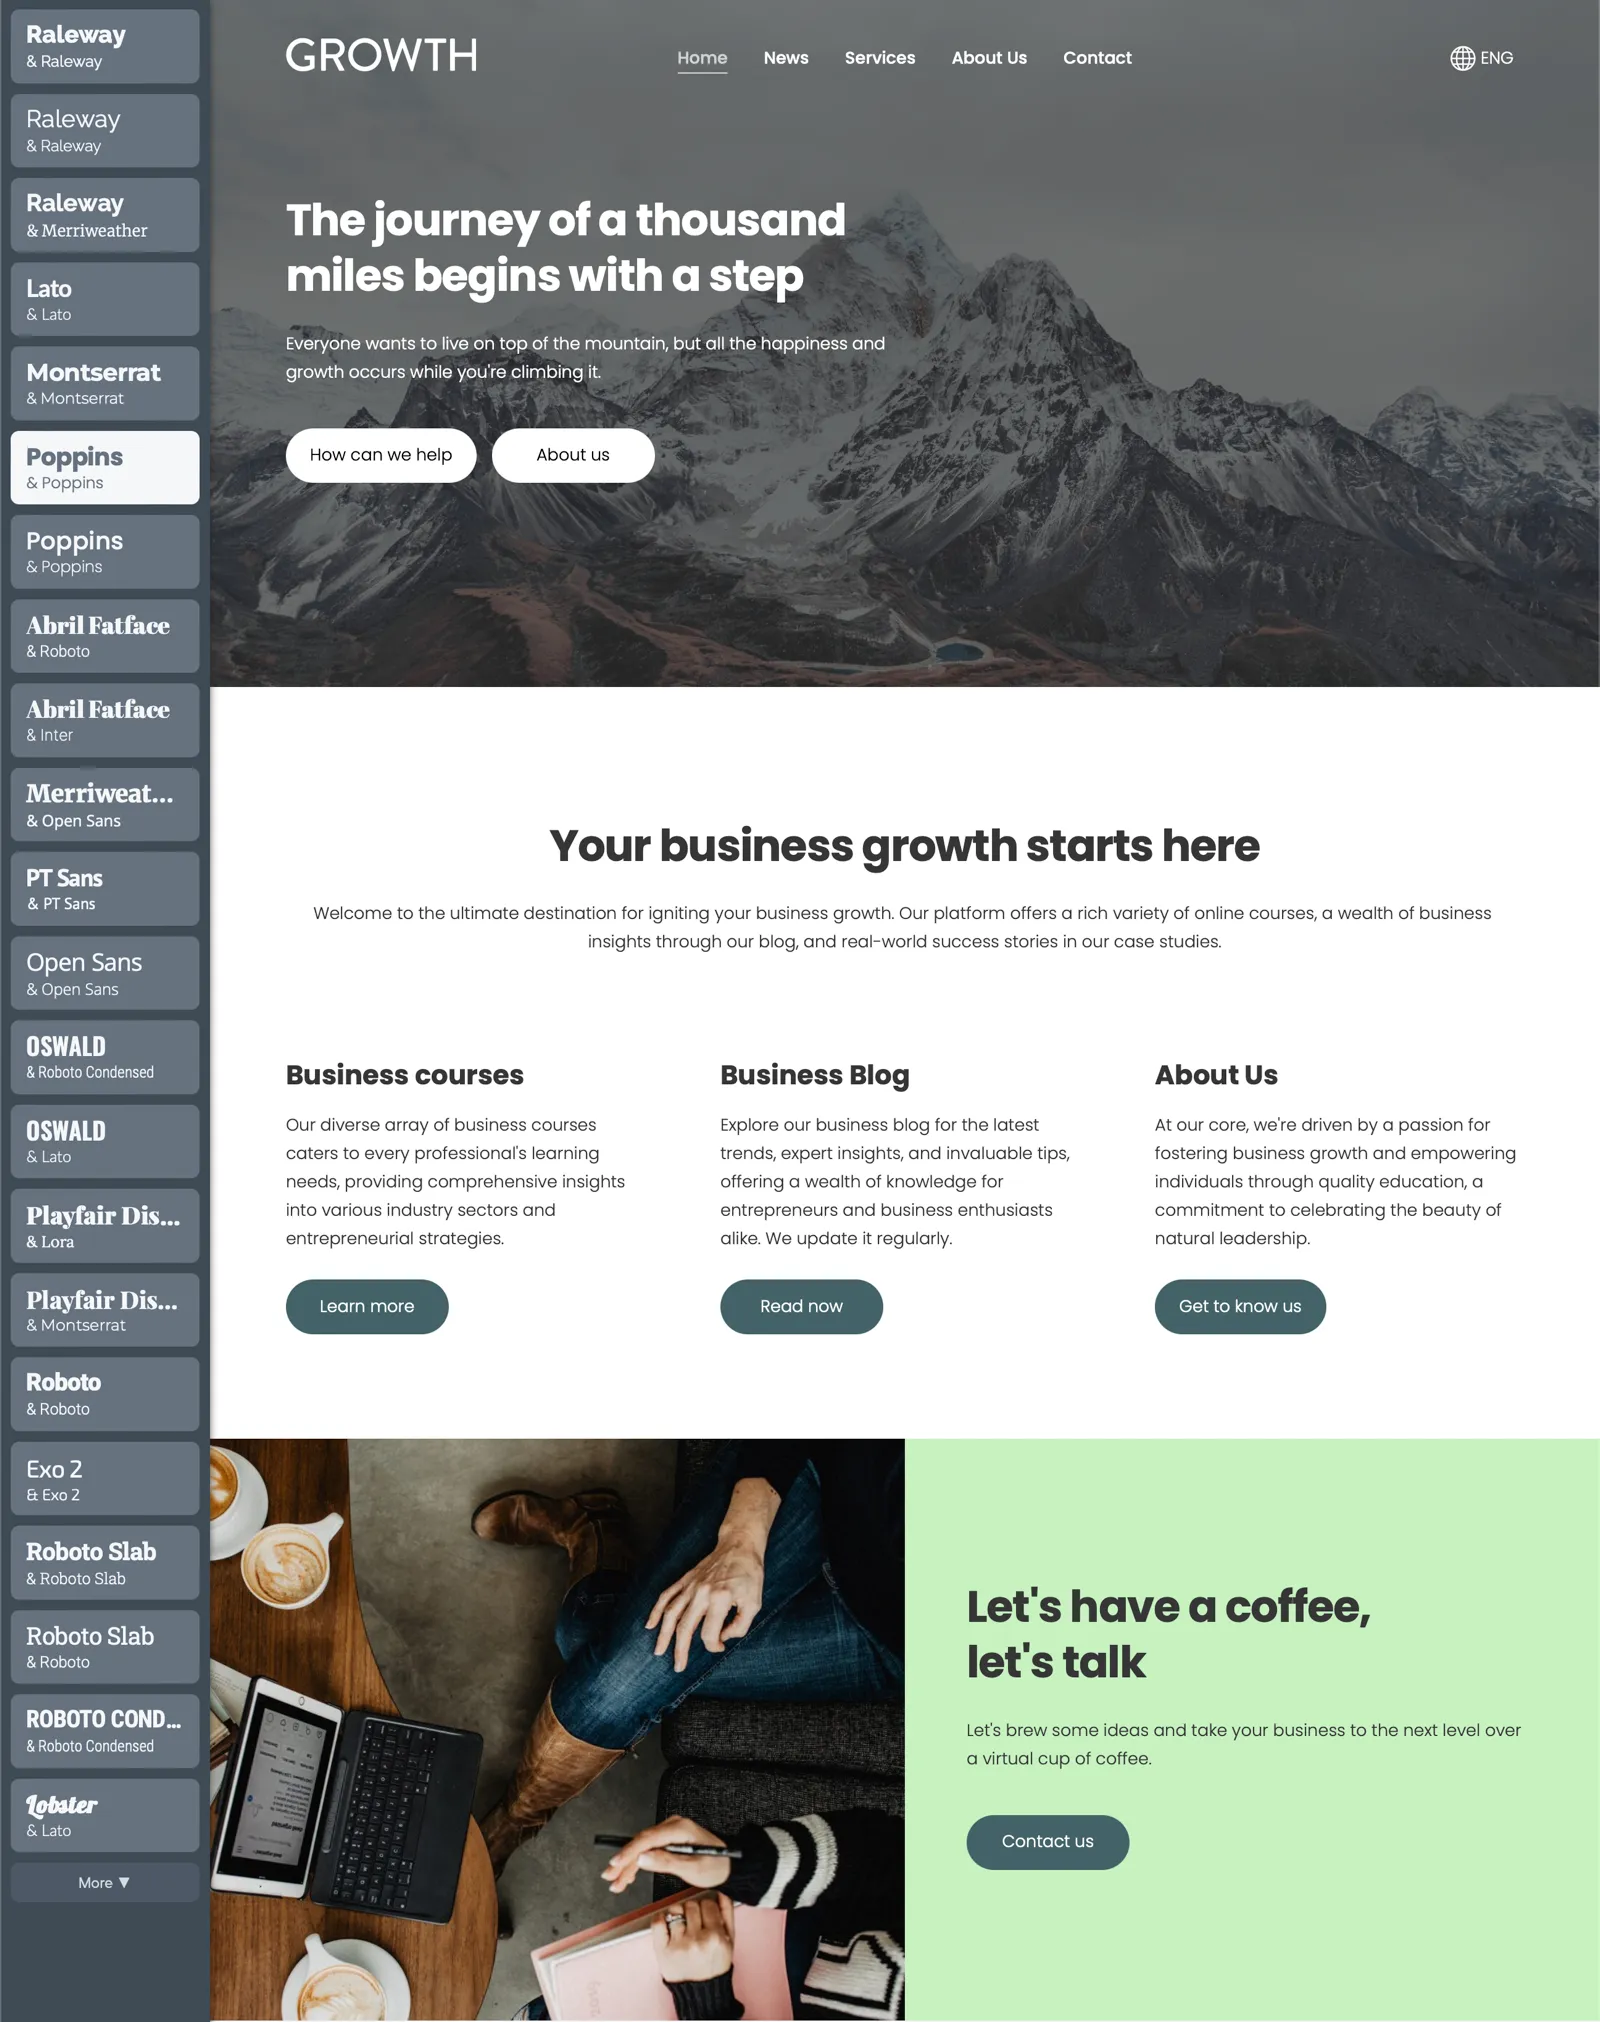
Video: How to change fonts on your website.
Step 3: Create the most important pages
Once the design and home page are in place, it’s time to create the other pages needed to provide all the important information to your visitors, to convince them that your product or service is what they need.
- Services — a page to describe your services or products in a concise way.
- About — a page for guests to get to know you and discover your story.
- Contacts — here, guests can easily get in touch and get answers to their questions.
- News or blog — this is a great opportunity to create content or post news.
- Gallery — can be used to inform or convince website guests through pictures.
Tip: Don’t get too carried away with the number of pages on your website. Think about what will be critical for your guests and include only that.
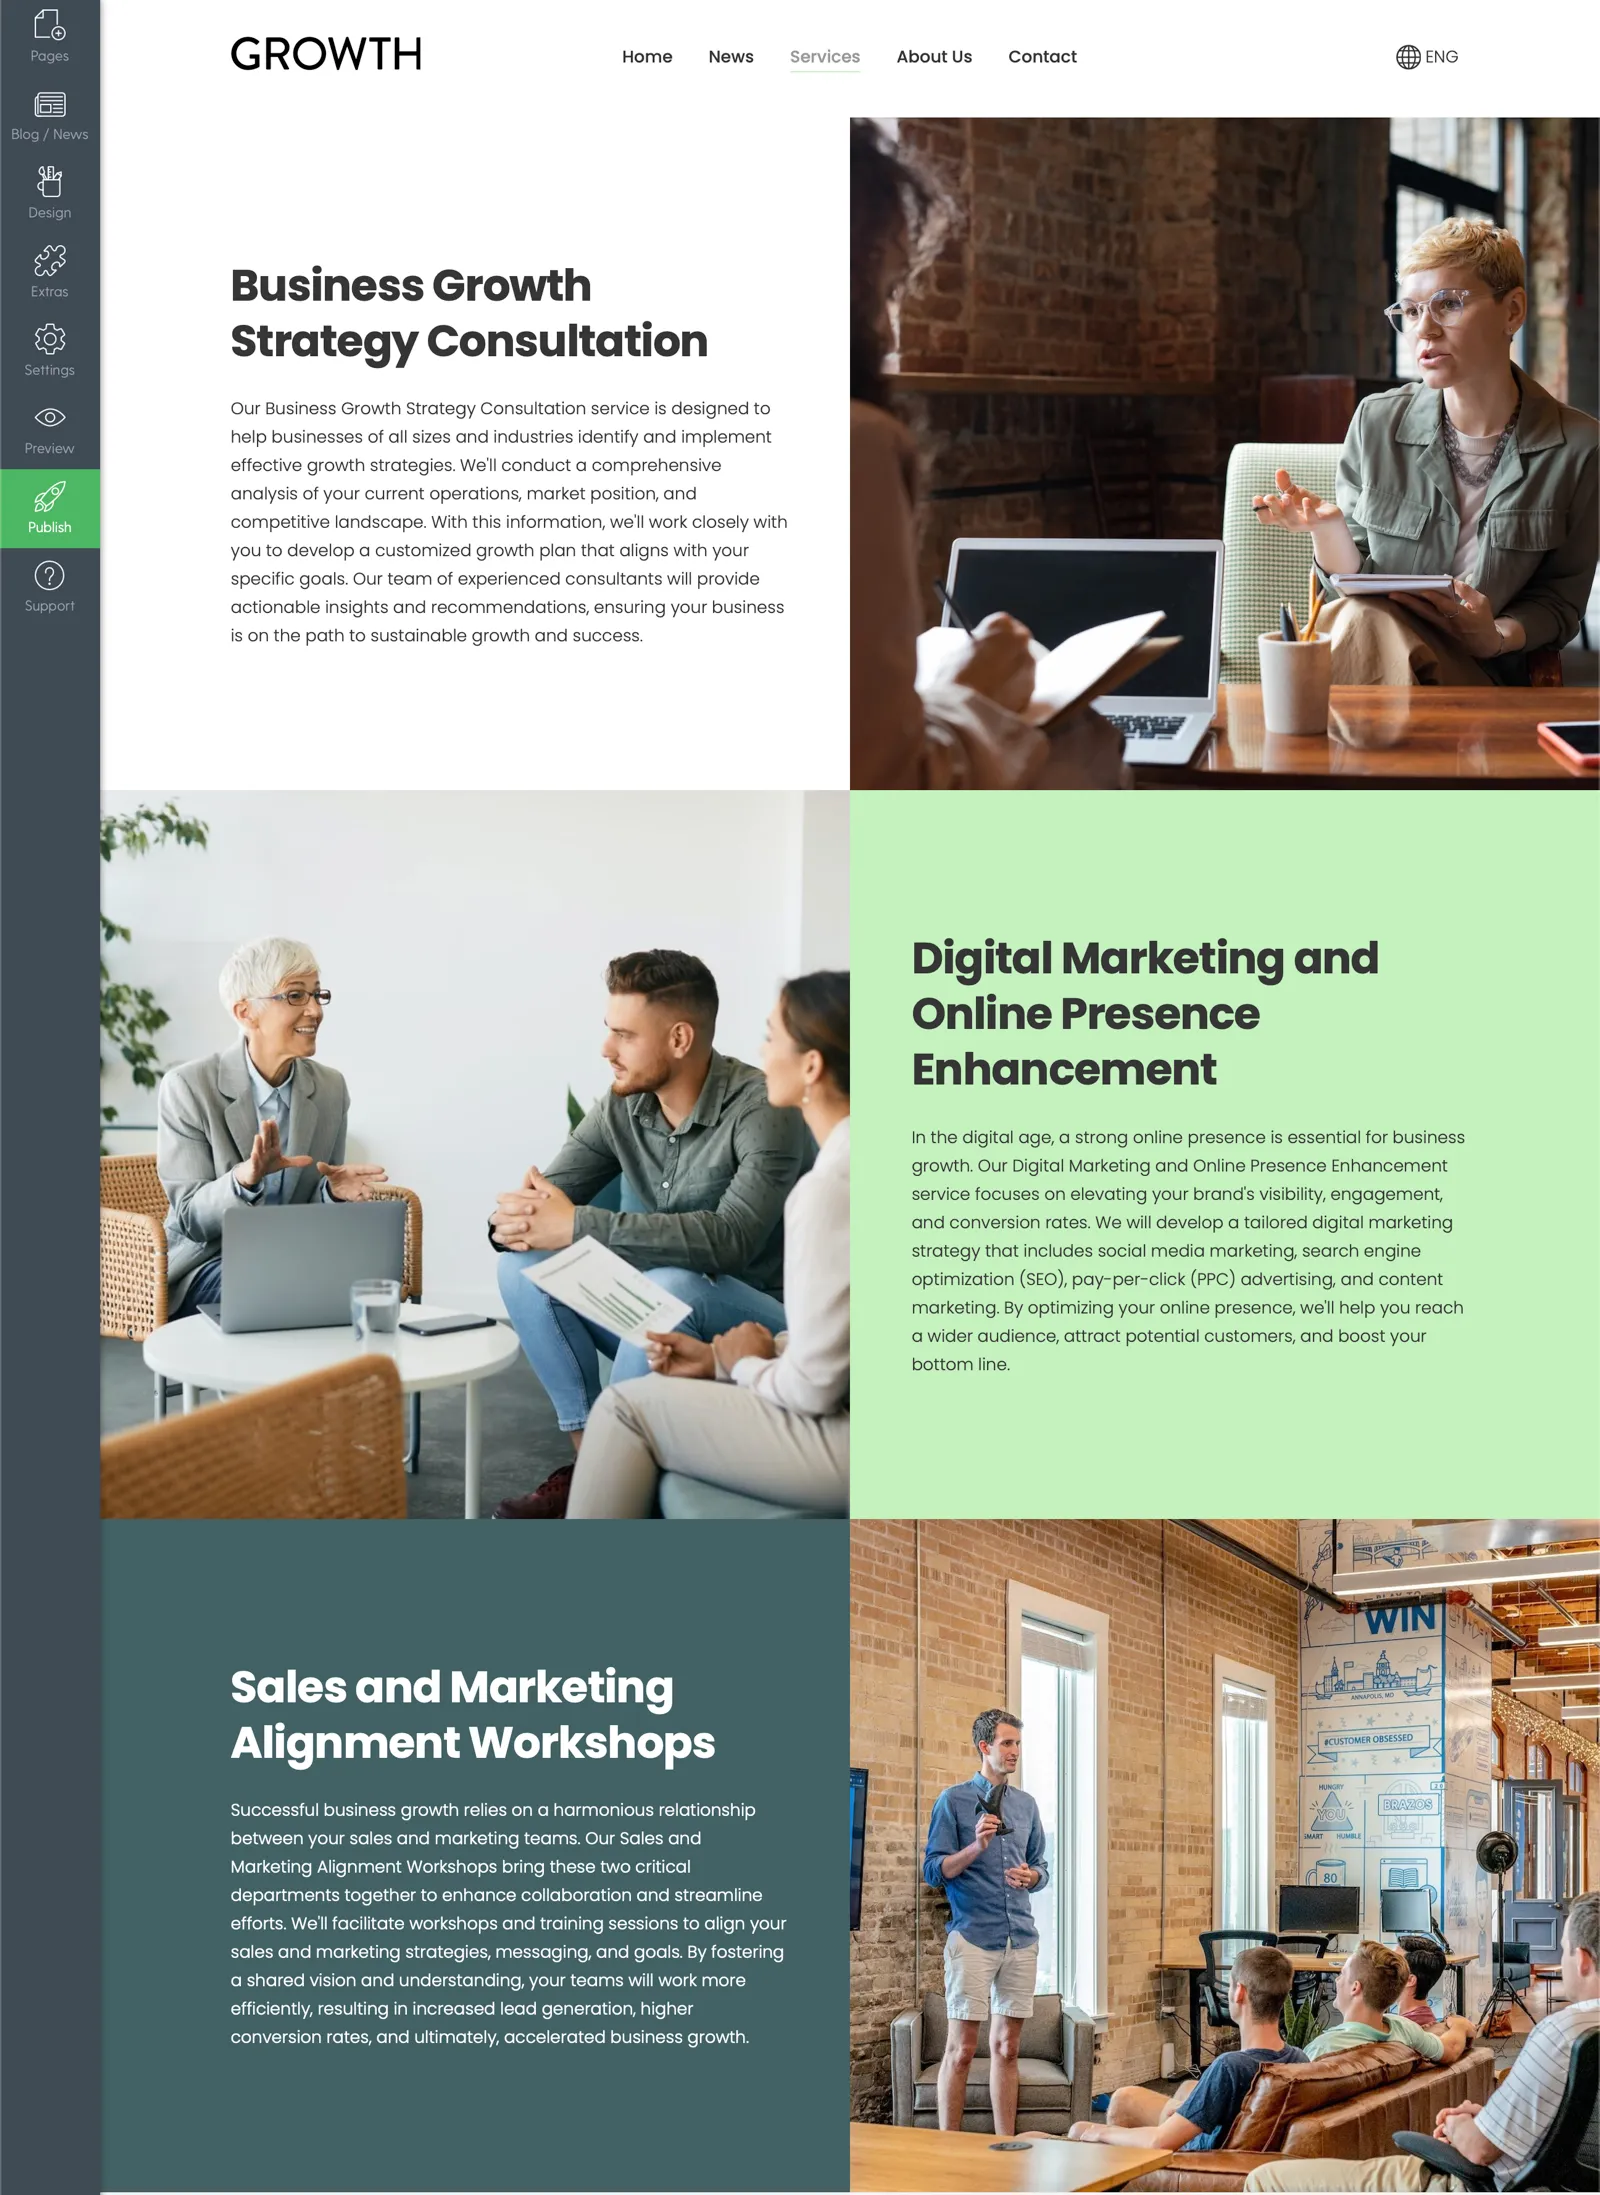
3.1. Creating a services page
In most cases, Mozello automatically creates a page called ‘Services’. Click on this page to edit it.
Once you open the page, you will see that a draft of it has already been prepared. You can use this draft and just fill in the blanks, or you can create your own layout. For demonstration purposes, we will create our own layout.
When you create a page with Mozello, it’s very easy to add new content blocks:
- add content blocks in the spaces provided by clicking on the round + button;
- change the style of the existing content blocks by clicking on the content block settings icon;
- use the up or down arrows to change the order of the blocks (visible when there are multiple content blocks);
- delete a content block by clicking on the bin icon.
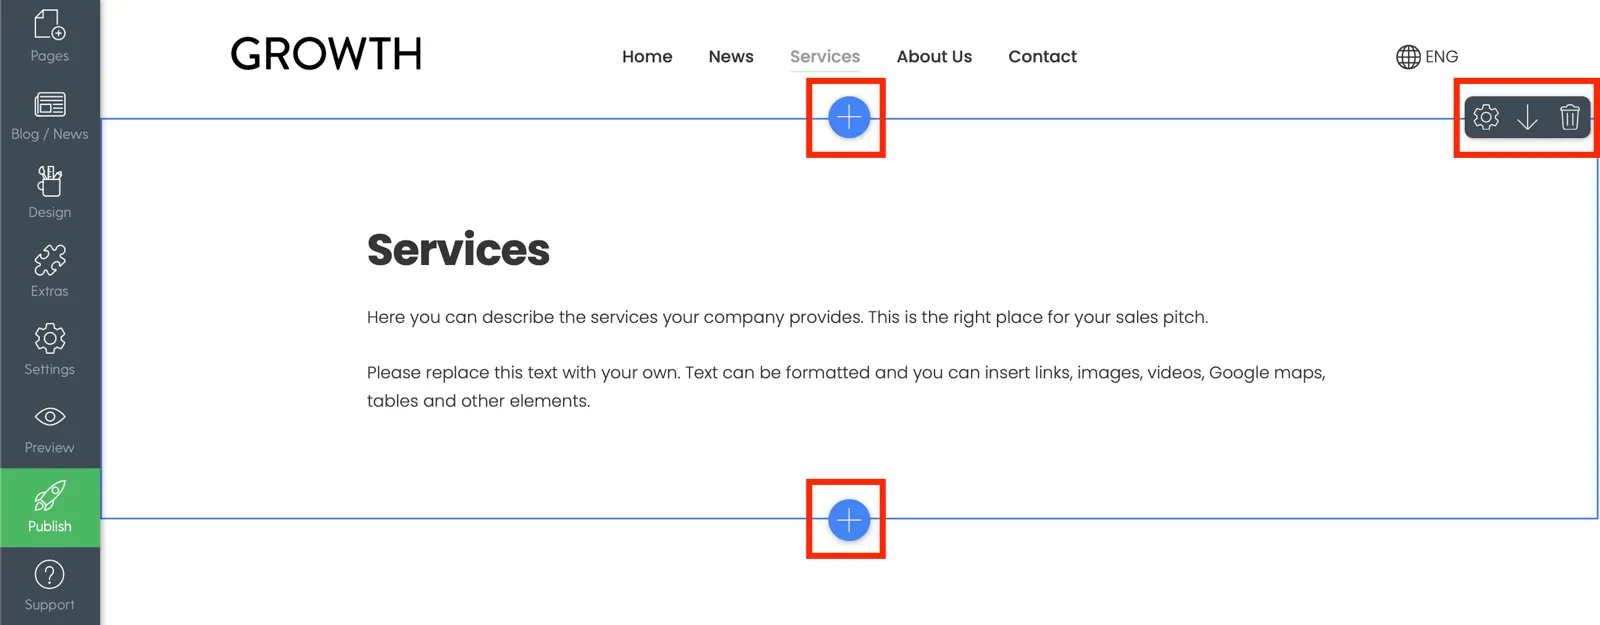
The image below shows the types of content blocks that can be added. Different types of content blocks are available on Mozello. From text blocks to banners, product blocks, and contact forms.

Video: Editing the content layout.
All content blocks can be easily and extensively edited to create diverse and customised website designs.
- the background colour of the content block
- the height and width of the content block
- the number of content columns
- the number of content rows
- activate the header or footer row
- adding buttons
- etc.
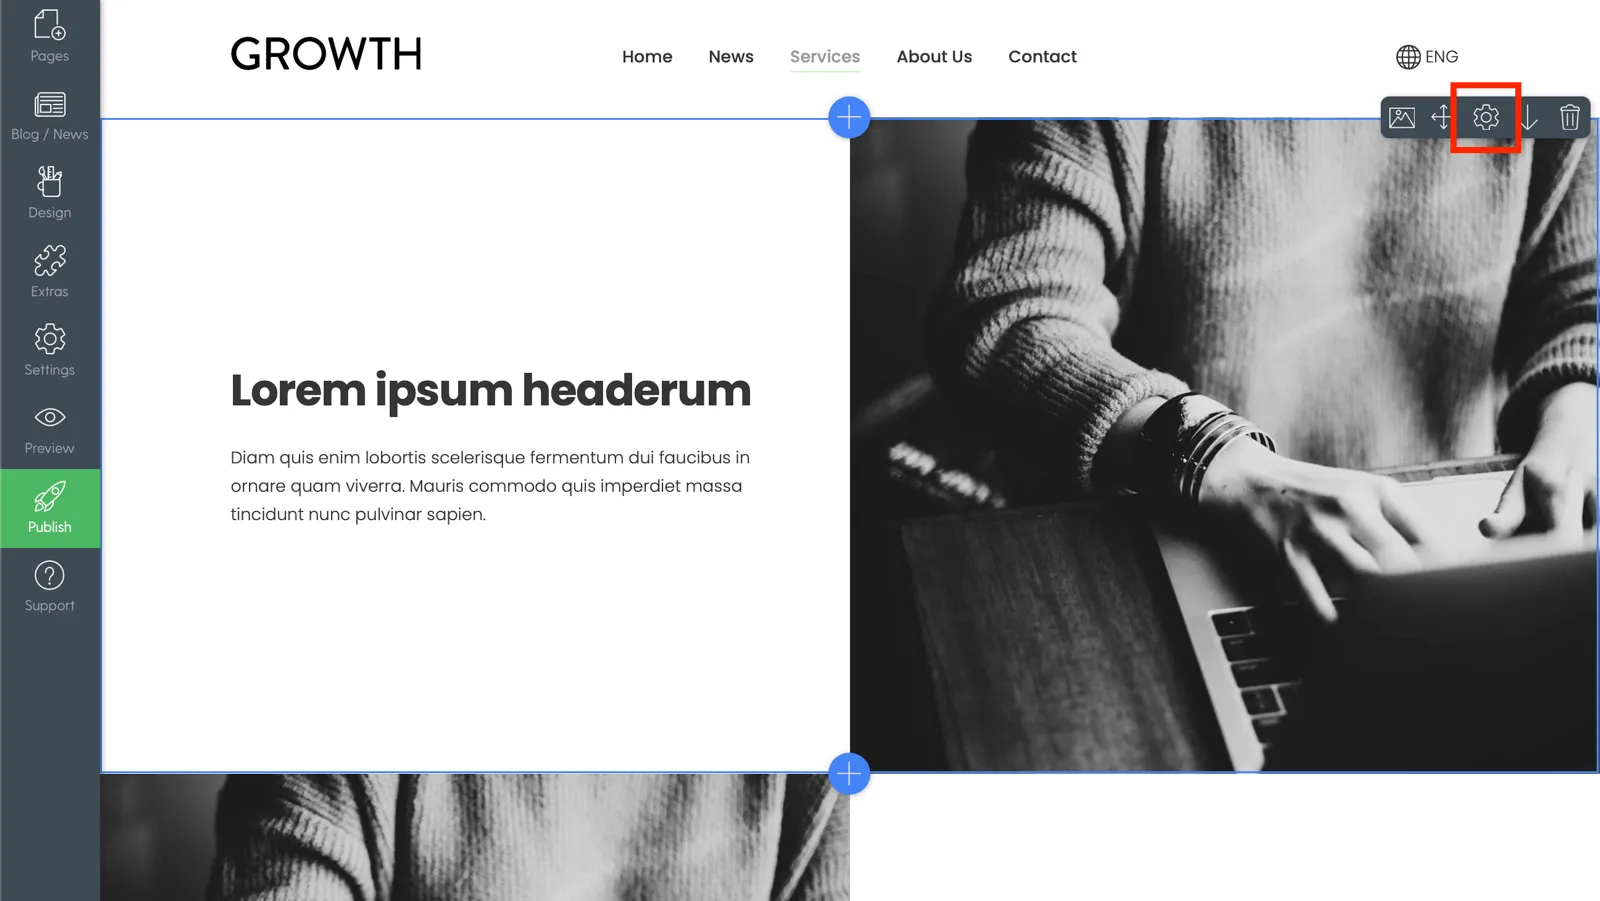
To edit a content block, click on the settings icon at the top right corner of the content block.
Tip: Think about the layout of the page and don’t get too carried away with long texts, because nobody reads them anyway these days. Long, unstructured, and poorly formatted texts will make the page look tiring and unprofessional. When creating content, format the texts to have headings and include visuals: this will help your visitors to navigate and absorb your information more easily.
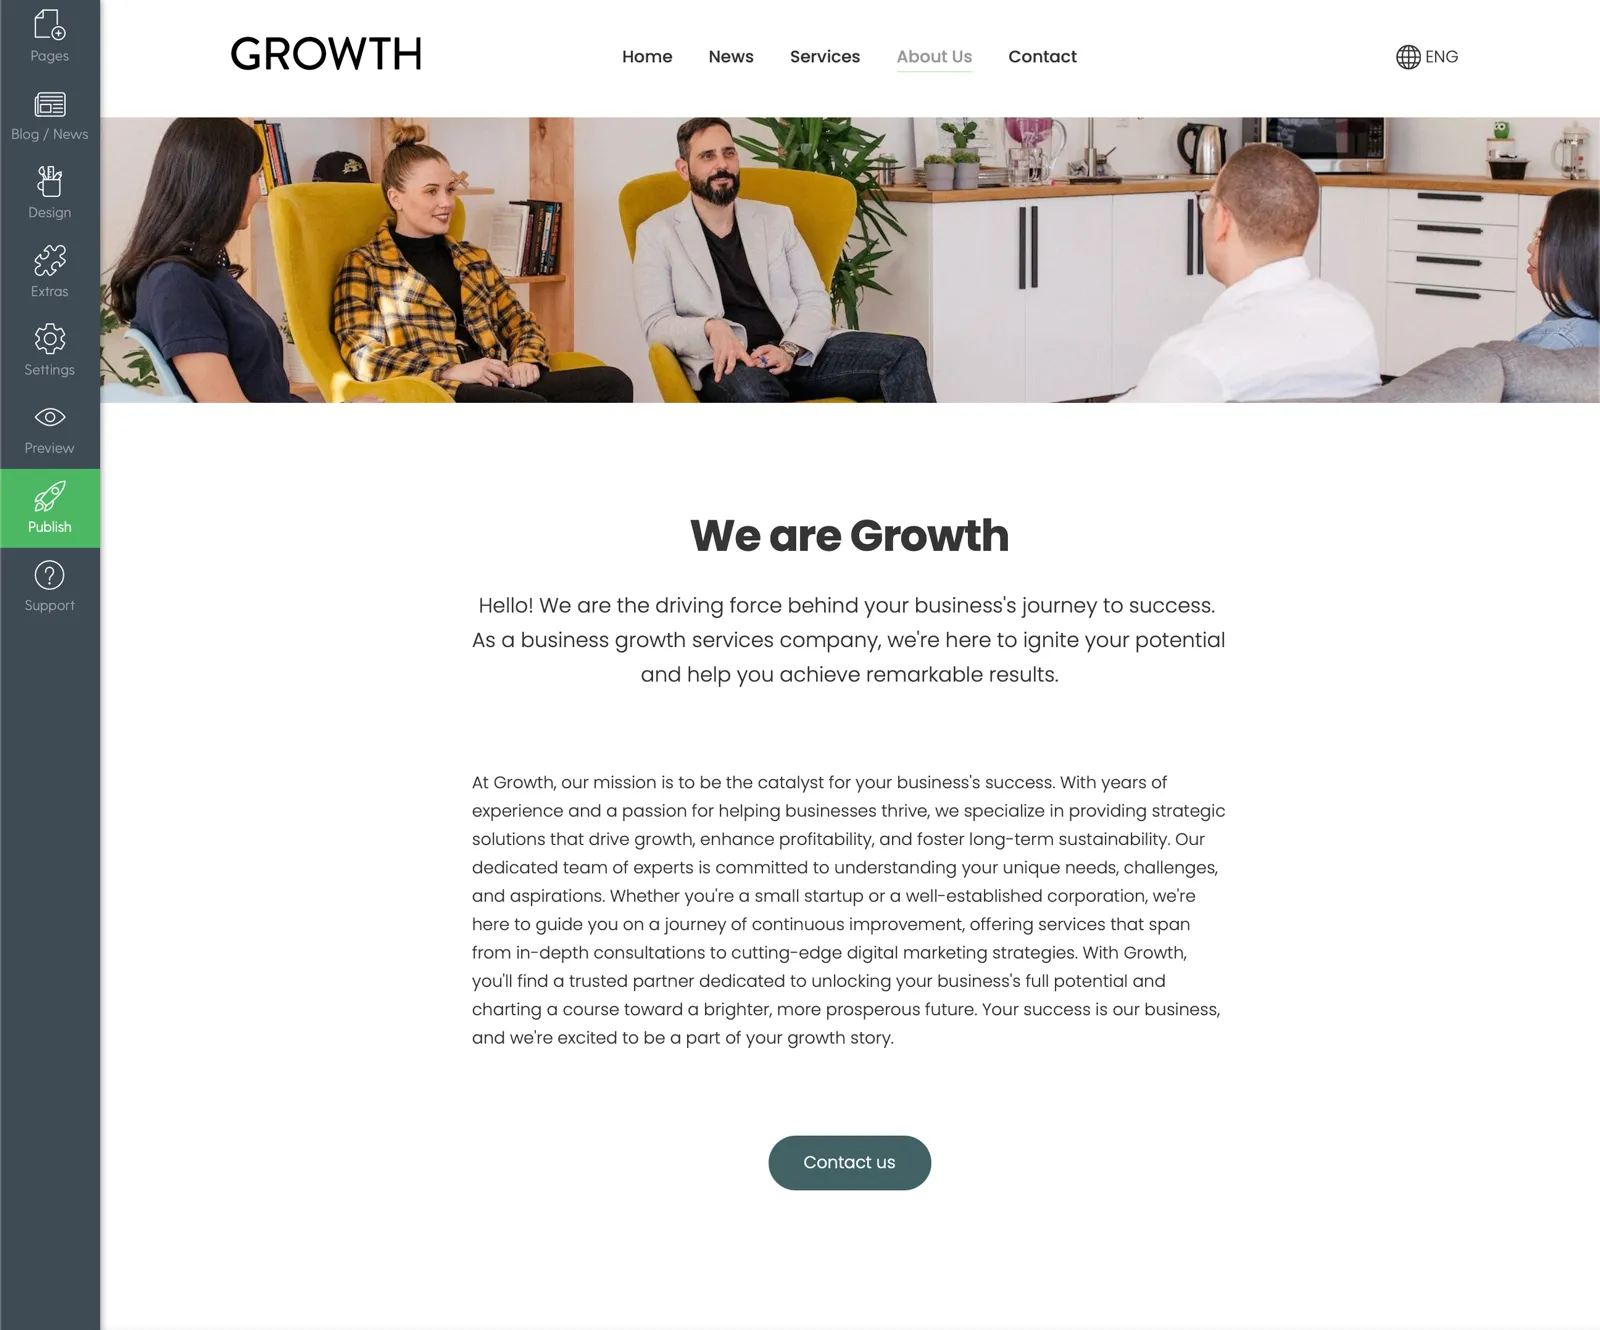
3.2. Publish information about your business, yourself, and your team
The ‘About us’ page is important because it makes it possible for potential clients to look into the credibility, the reputation, the quality standards, and the people of your business, which is particularly important in the digital age, when competition is high and many dubious businesses offer their products and services, too.
A well-designed About page will strengthen your brand, make your business look more human, and can help convince your website visitors to choose your product or service. So tell your story and introduce yourself and your business to your visitors through your About page.
In Mozello, this page is usually already set up and just needs to be edited, like the other pages.
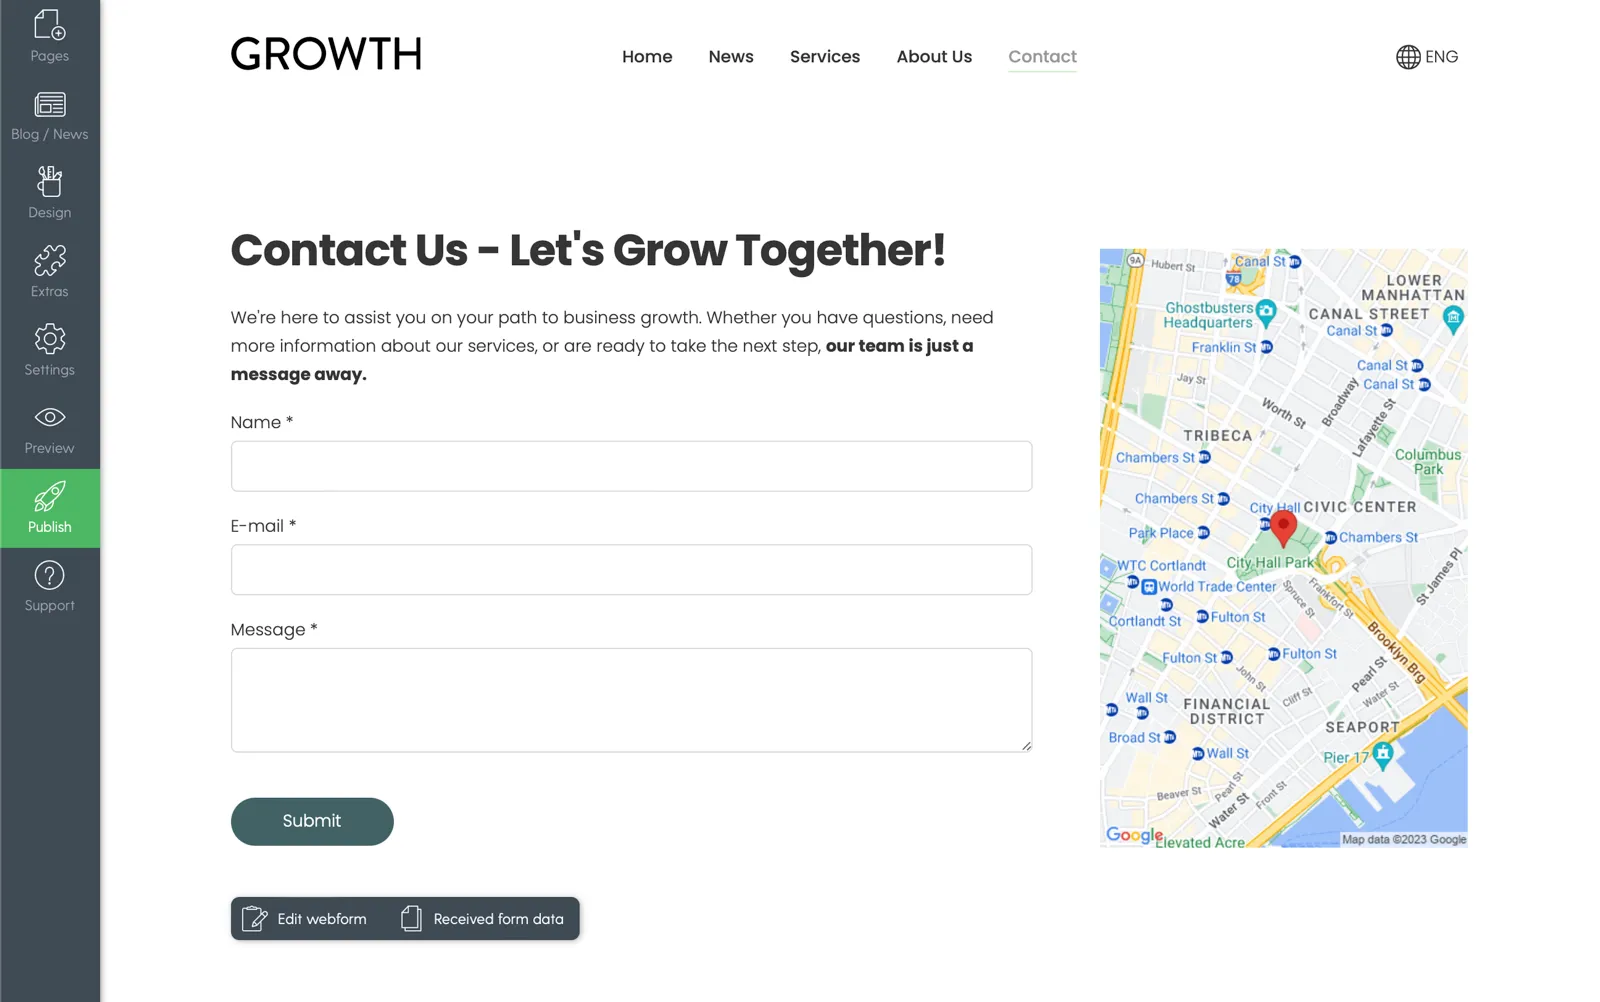
3.3. A proper contacts page
If all goes well, clients will want to get in touch with you, ask questions, and set up a transaction. This is a great opportunity to show that the company is approachable and open to communication, which in turn is a sign of good service.
Go to the already generated Contacts page and add contact details, working hours, and other important information.
In this page, you can:
- Customise the contact form to your needs
- Enter your phone number, e-mail, physical address
- Include a map with the location of your office
- Create additional content fields if necessary
Tip: It is particularly important to provide a physical address, as this significantly increases the credibility of the company.
3.4. News/blog page
Blogs and news improve your company’s SEO (search engine optimisation) because news articles usually contain keywords that are relevant to you, which successfully show Google that your page is appropriate and relevant to the topic. Blog and news articles are the only place where you can relatively afford to post big chunks of text.
Blog content can be a great way to attract guests by offering valuable free information, like tips, solutions, and news. At the same time, it’s a good opportunity to demonstrate that you are a competent professional who knows about your field. A blog is a useful way to communicate with your audience and make people feel confident about your company.
For example, it is useful for an business consultancy agency to publish articles with tips, advice, and secrets for how to grow your business successfully.
When you set up your website with Mozello, the blog page will already be there. All that’s left is to fill it with engaging content.
To start, click on Blog/News in the main toolbar.
The News editor section makes it easy to add, edit, delete, and hide articles, and to change settings.
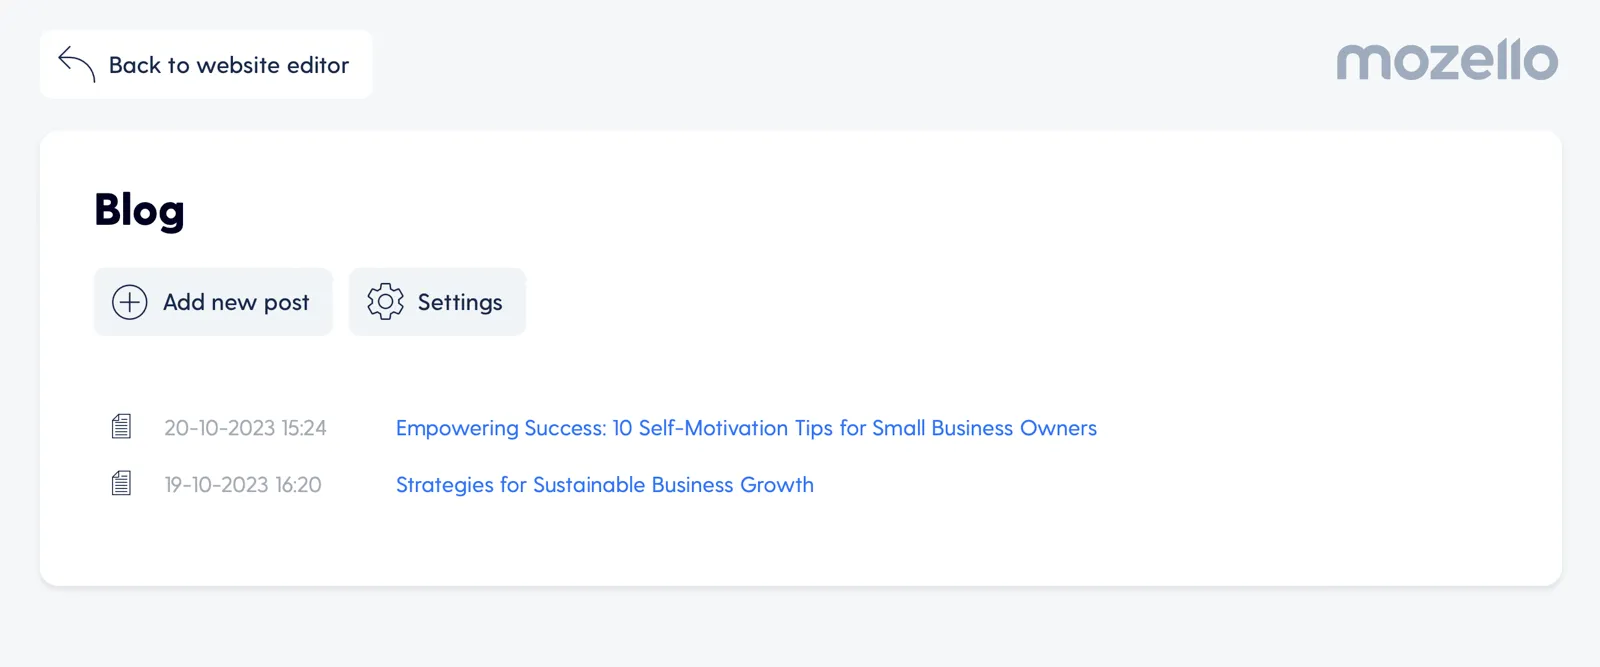
To create a new article, click Add new post. The text editor is very simple and requires no special knowledge.
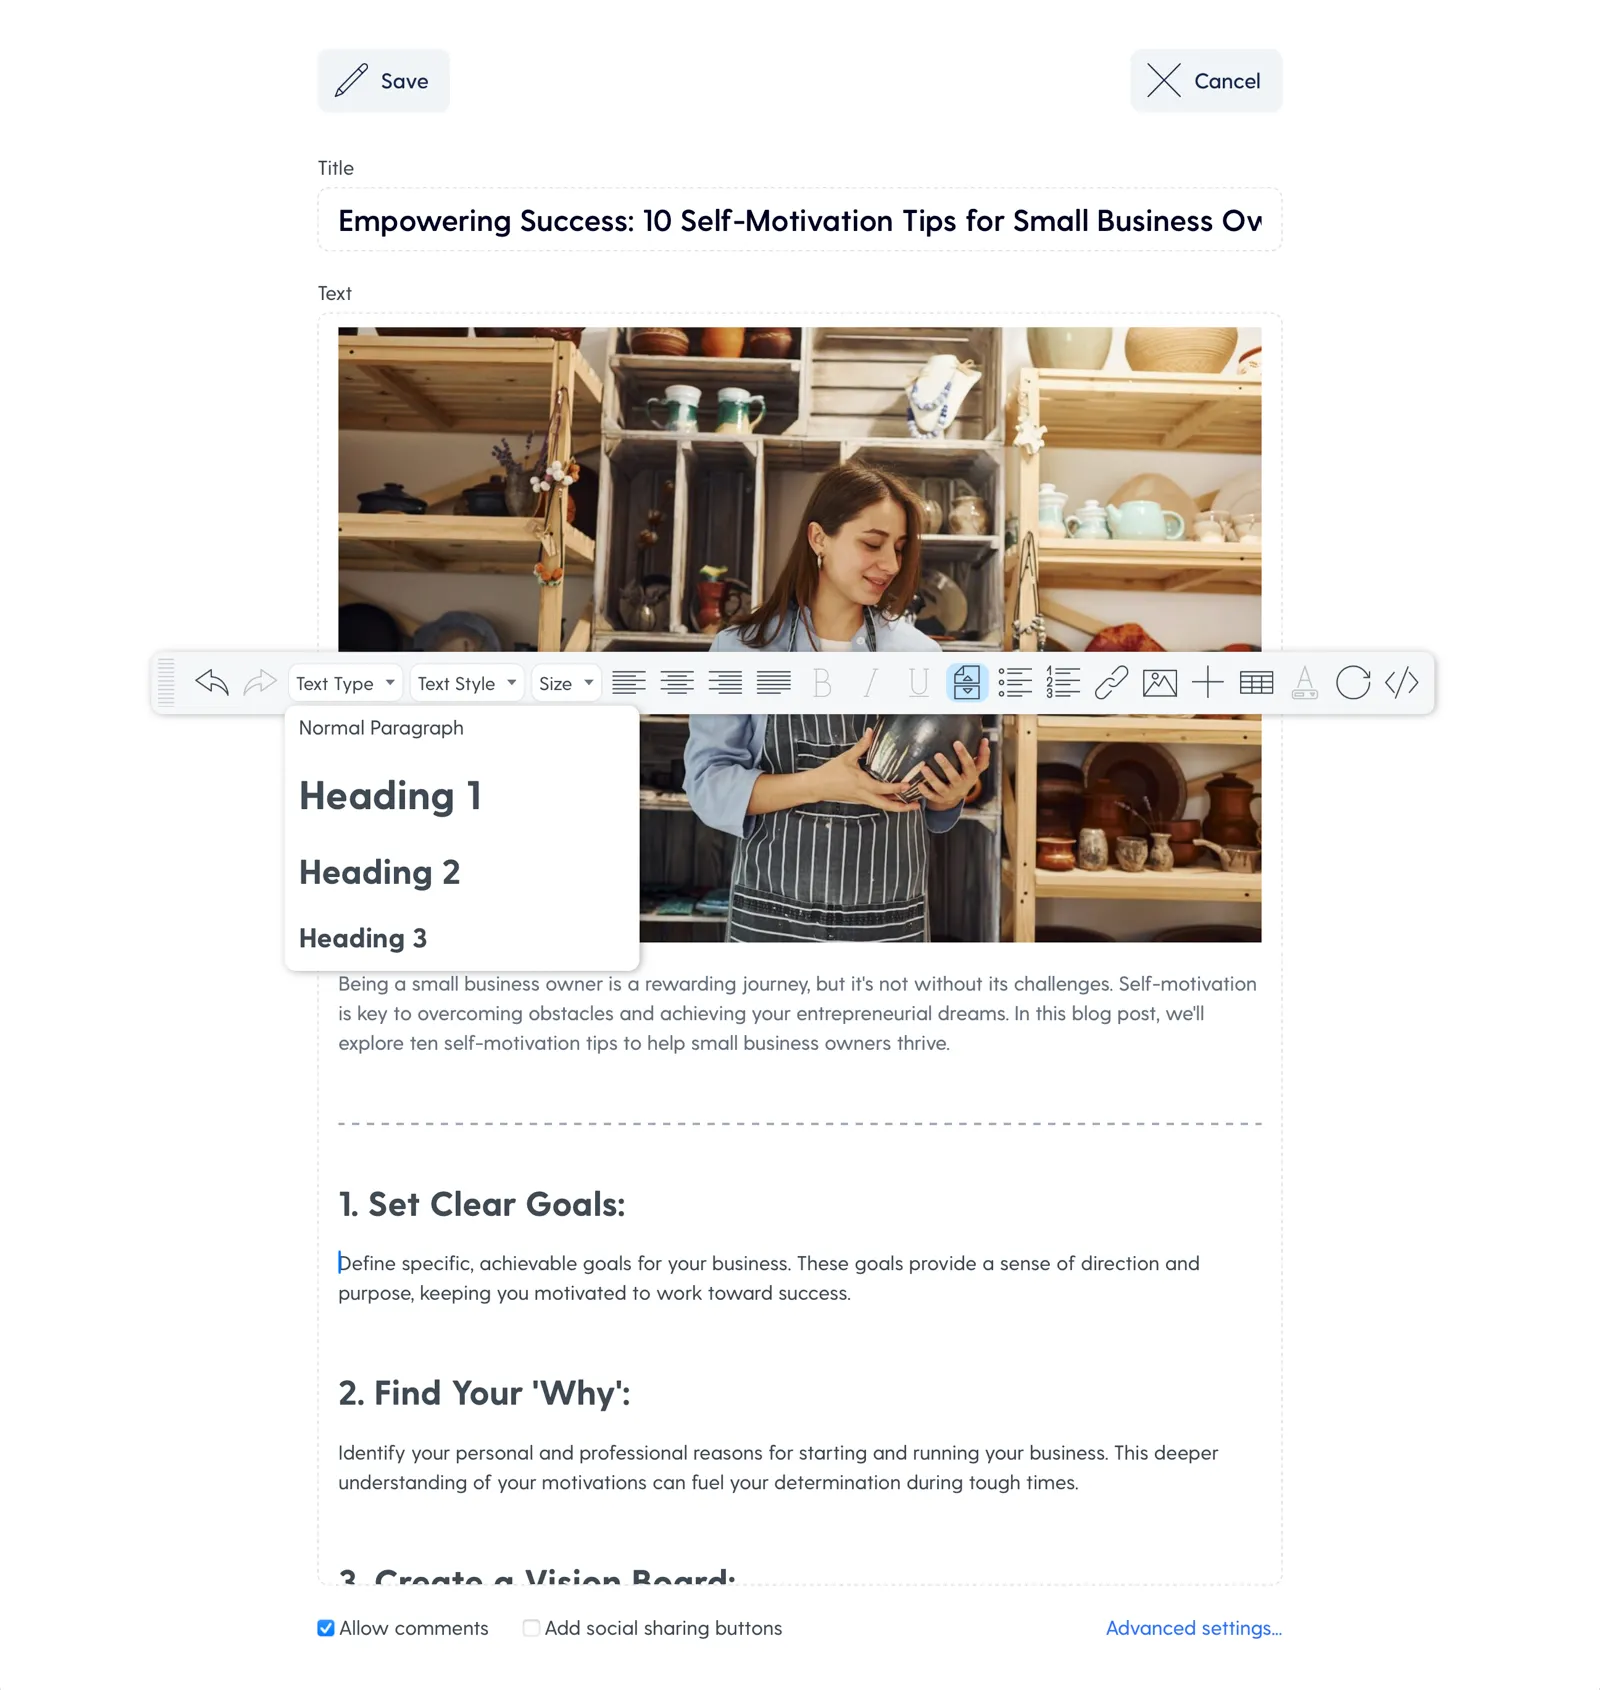
Tips for creating blog posts:
- Read the article: Why your business needs a blog and how to turn it into a success
- Read the article: How to write blog posts
- Read the article: 25 examples of a great blog post headline
- Insert the main picture at the beginning of the article. Its preferred size is 1200x630 pixels. Your blog will look more organised when the first picture of your blog post is of this size, and when you share articles on Facebook, for example, the article will immediately look good because the first picture will meet the Facebook standard.
3.5. Create a gallery
The gallery is useful, if:
- Your product or service is visually appealing and/or if images can convey valuable information and help convince the client.
- You have images you’ve got from clients who have used your product or service. This format works much better than text-based testimonials. (If this type of testimonials is not available, we recommend thinking of ways to get it)
To create a new page with a gallery, click Pages on the left side menu.
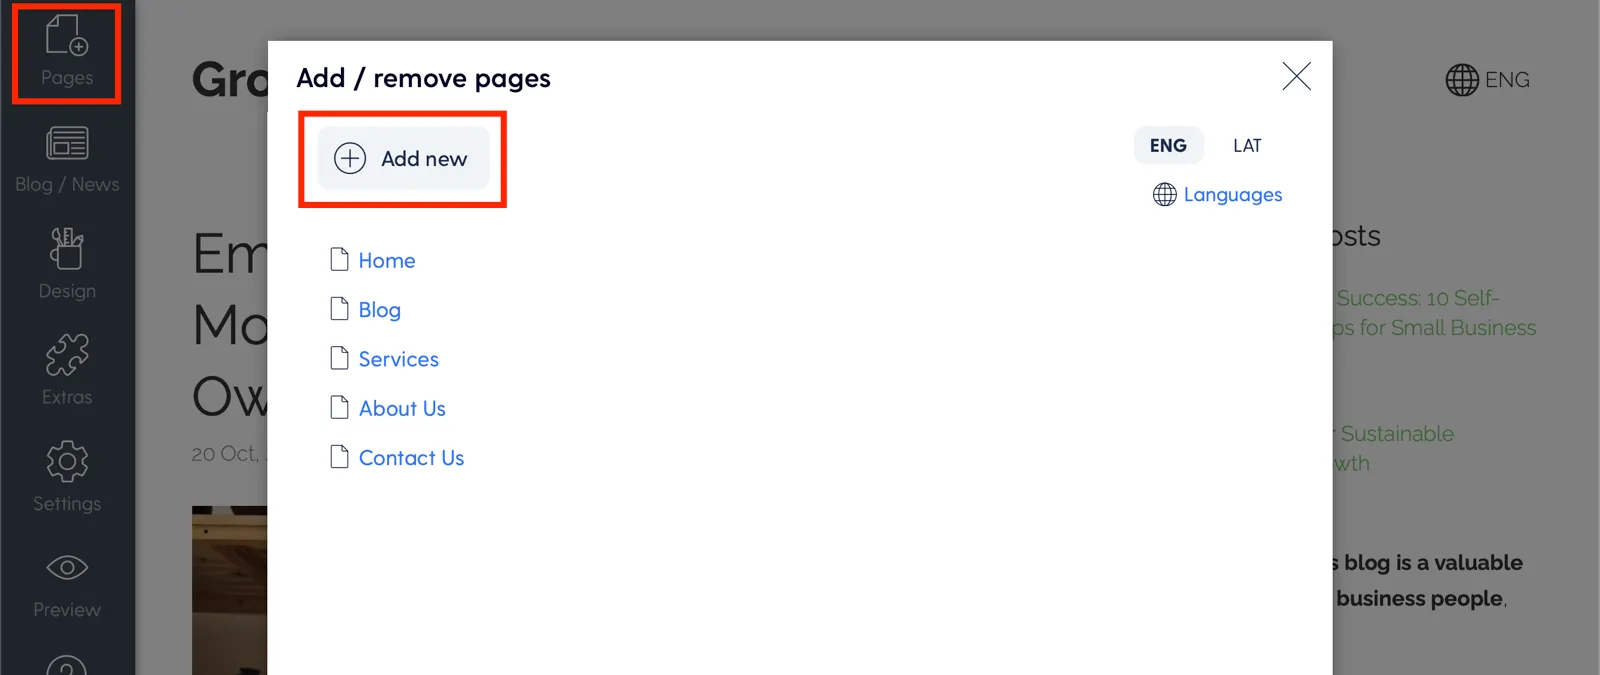
Here you can:
- Add and delete pages;
- Manage existing pages (name, URL, order);
- Edit the TITLE and META tags for SEO;
- Add new languages to the website.
Video: How to create and manage website pages.
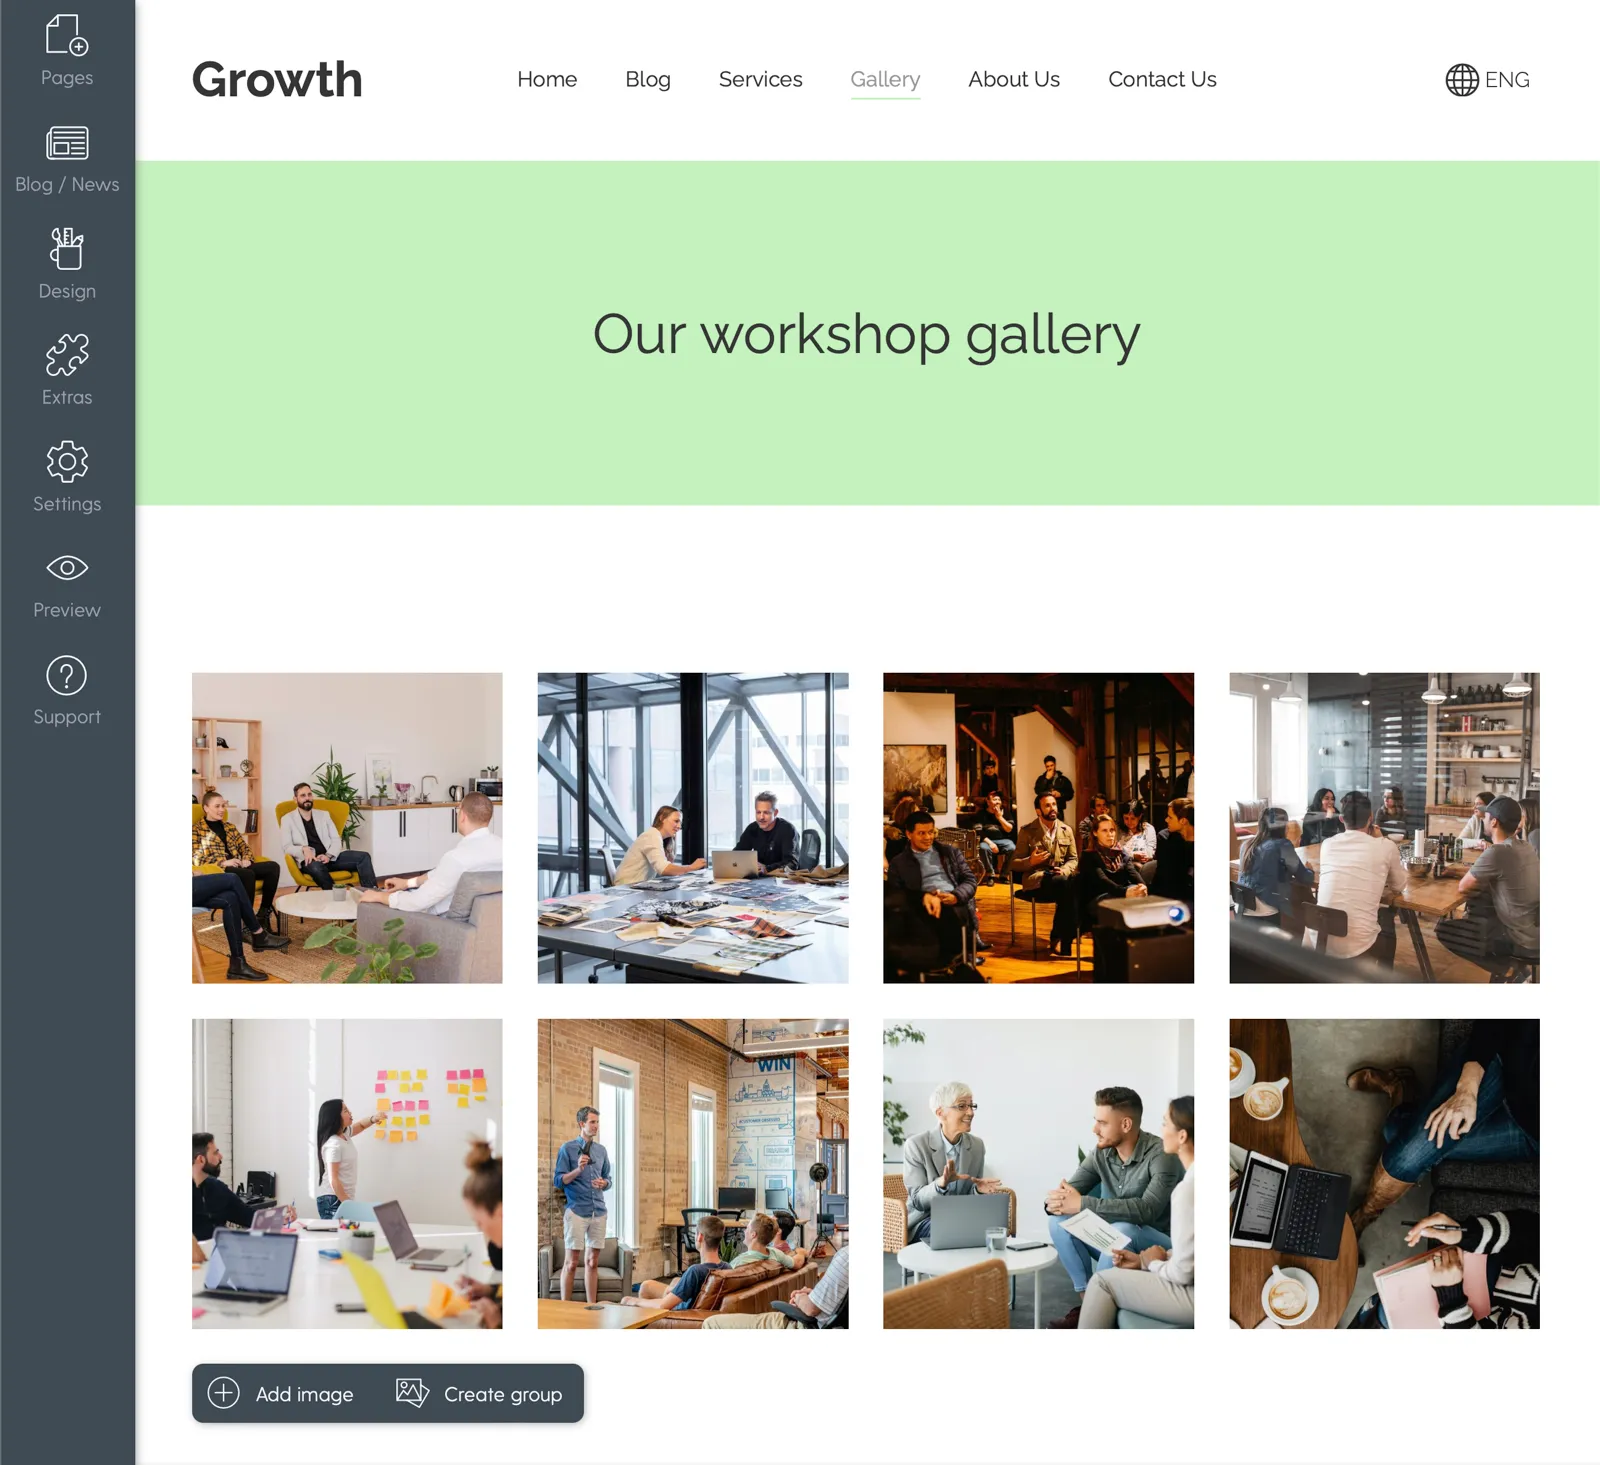
To create a gallery page, click Add New button and then select the page type: Image Gallery.
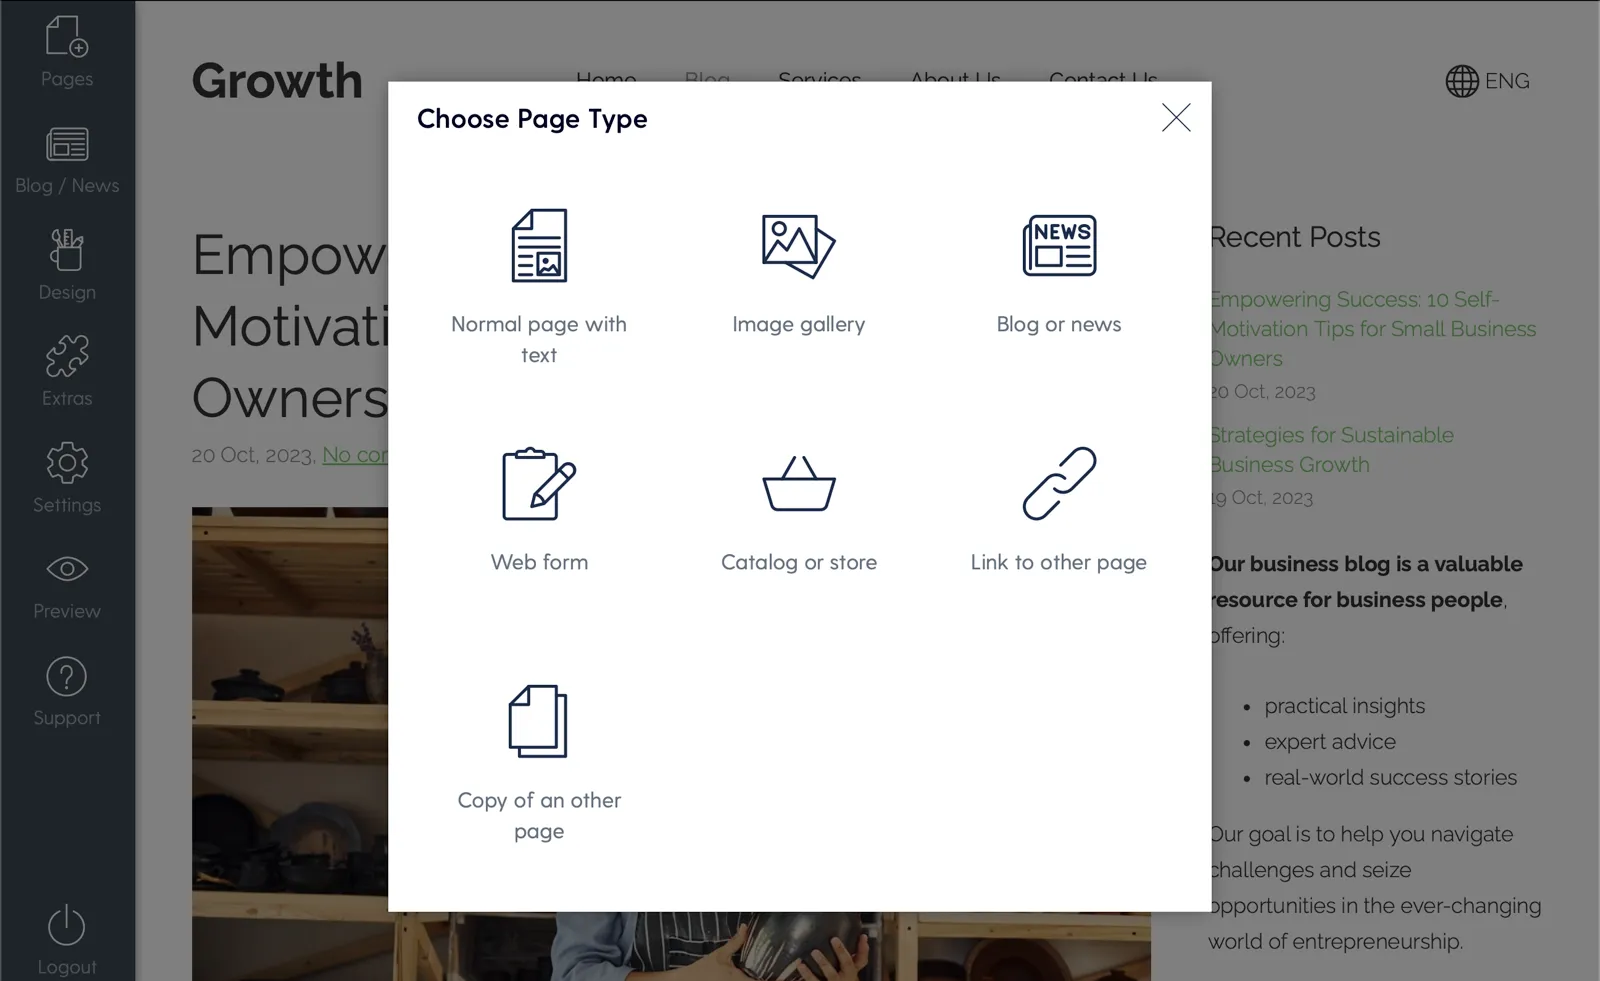
The next step is to upload your images to the gallery.
If needed, you can also create groups where you can, for example, post pictures of particular events or products/services.
Step 4: Publishing your website
Once you’re happy with the final result, you can click the green Publish button on the main toolbar. After this the website is public and becomes available to visitors.
You can edit and update the website at any time.
Next steps
For a more professional look, you can buy a Mozello Premium subscription and add a custom website address (domain name) and more.
For more about building successful a website, online store, visit our blog at mozello.com/blog, where you can find a wealth of information that can help you grow your business online.
For starters, check out these articles:
- ABCs of branding: How to design a memorable website
- 5 things to do before creating your website
- Moving your business online part 1: planning out your website
If you have any questions or need help, feel free to reach out to Mozello Customer Service.
